 |
| All buttoned up: formal and clean-cut |
I am almost good at sleeve plackets. Give the woman a medal, people.
Seriously, as I was trucking along, attaching the collar, pressing the plackets, adding them to the sleeves, I realized that I wasn't nearly as confused as usual! Hooray for progress!!
(I did foolishly press something to the wrong side which has resulted in wonky plackets, but in my mind that is not the same as being COMPLETELY AND UTTERLY CONFUSED.)
Working on this shirt went quickly, especially compared to the hand-beading work on the FGD. Hours for a 2-inch space...it's rewarding, but it takes time. (Ah yes, photos and post about the FINISHED dress coming soon!!!)
This shirt, on the other hand, pressed well (thank you, linen) and has no print to match, which meant I could just stitch and press, stitch and press. I got a little carried away, which is how I ended up in strange sleeve placket land...see above. Buuuuut I think they turned out ok. What do you think?

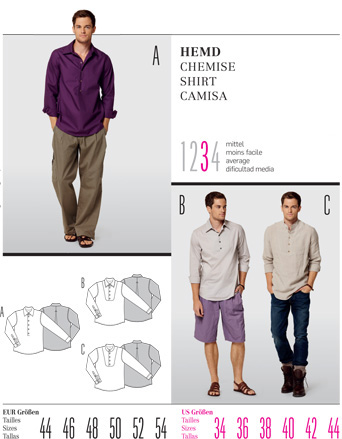
Anyway, husband and I both really love the mandarin collar of this shirt. It's different. We like different. I debated for a while on what buttons to use, and eventually settled on these dark ones. Does anybody else ever stand at the button wall for like 13 minutes staring at buttons? I imagine it's strange to those around us. Oh well. Let 'em look!, I say. Here's a photo of the shirt in a more informal styling.

Since this was my first time (but not my last!!) using this pattern, Burda 7525, I decided I make the shirt straight out of the envelope, using size 34. It fits almost perfectly!! What was I doing all that time altering a Vogue pattern when I should have just used Burda?! Lesson learned. Hooray for Progress!!
I really love making men's shirts. I think it's because there are so many external elements to work on. Don't want to sew shoulder seams? That's ok, press a pocket. Don't want to make button holes? That's ok, fold some cuffs. There are many steps, but they are becoming more and more simple to me with experience.
I was really pleased with myself on how nicely the collar went in! I only had to unpick one little bit before sewing it down. Hooray for progress!!
 |
| Creative Laurels label back there...thanks, mom! |
Can we talk about how the addition of a sewn triangle makes the back pleat seem extra cool? SO COOL.
 |
| Sorry for the flash, but look at those pretty stitches! |
I ended up using flat-fell seams on the inside, even though the pattern called for a zig-zag or overlock. I know that those seam finishes fit the "vibe" of this relaxed shirt, but it doesn't seem right to sew a men's shirt without making beautiful insides. So, pretty seams it was.
When all was said and done I had one extra button, which I sewed to the lower part of the right side seam, in the event husband ever loses one of the other ones. I still feel very clever about it.

I wish husband had been home when I took these photos so he could show some more of his expert modeling.

In Other News
I'm still working on the quilt that I started last winter. My decision to hand quilt the entire thing has made for a rather time-consuming project. It's a Queen size quilt, and frankly, I can only work on it for a little bit at a time before my fingers get sore from pushing the needle through all the layers.
I stitched late into the night last night, slept, and woke up to try some more, but the fingers hadn't recovered. If I didn't have lots of practicing to do I'd just power through, but with the marimba competition looming in June I have to get all the practice time I can.
Between that, preparing to move, and life's other happenings - weddings and travel - it's hard to find time to blog about sewing in addition to doing it. Sadly, the time between posts will remain a few weeks apart because I have to prioritize those other things for a while. But I'll still be happily sewing and crafting, in addition to everything else.
<3 :)