Showing posts with label special days. Show all posts

Thursday, July 5, 2018

Made! - Simplicity 8085

As usually happens with family events, my cousin's wedding was an excuse to make myself a new dress!


I chose the material and pattern at the end of pregnancy as a first project for when my body shape began to turn back to normal.  We're still very much a work in progress in that regard, but I do really love this dress, especially with my turquoise belt.

The pattern is Simplicity 8085, a vintage reprint from the 1950s. 

Simplicity Pattern 8085 Misses' Vintage 1950s Wrap Dress in Two Lengths
I had to make many adjustments to the back in order to make it fit, most notably removing the darts and even more extra material.  Between my sway back and upright posture, I didn't need near as much fabric back there as the original drafted pattern.  I also raised the armholes, and then needed to tweak the bust darts.  I'm not totally satisfied with those, but it works!


The back of the dress is held in place with snaps! The pattern suggests adding some along the skirt's bound, wrapped edge, but I didn't have time to do that before the wedding. I'll add them before wearing this dress again, though, as a rogue breeze resulted in a surprise mooning for all those behind me! Good thing I, as well as my family, have quite a sense of humor. :)

Monday, September 25, 2017

Made! - Hack Vogue 8633 with maxi-length wrap skirt


Long wrap skirts have become a favorite garment.  You can make them to fit, but with some creative safety pinning you can change them to fit you at any point in life.  That's not the most glamorous point of view, considering I also enjoy the tailoring of men's shirts and couture hand-finishings, but sometimes a safety pin is all you need.  And we should admit that, mmm?


I made this dress for a family wedding.  The bodice, from Vogue 8633, is made of some upholstery fabric that I found and loved at my local fabric store.  The navy print I purchased in Utah while visiting my in-laws, and the coral satin underlay I bought locally on clearance.


Since the upholstery fabric is so thick, I didn't interface any of the bodice.  It stands up well on its own, and can be molded into different shapes at the neckline.  I prefer it curved down a little bit.


As part of my design, I chose to extend the back bodice around to the front and secure it with buttons on an angle, so that the bodice matches the wrap of the skirt.  This also kept me from worrying about a zipper.  It's lined, and the sleeves are bound in bias tape.


When attaching the skirt to the bodice, I used an inch allowance on the skirt so I could wrap the raw edges of the bodice.  Though it thickened the layers there a bit, I'd rather have that than scratchy edges.


Something I've contemplated is pinning up parts of the skirt to asymmetrically raise the hem, to make it friendly for warm weather.  The family wedding was outside, and this Tennessee September cooperated - it was actually a bit chilly! So, a maxi dress was just right for the temperature and breeze.


Anyway, this is my most recent make!  Not too difficult, not too easy.  Somewhere right between.

Sunday, July 24, 2016

Made! - McCalls 6952

McCalls 6952, labeled as an Easy pattern, was just that.  It's a princess seamed, sleeveless dress in different lengths. I decided mine should be a maxi, and reach the floor when wearing flats.


The fabric was purchased a few years ago on a trip to Mexico, and I looooooooove it.  I was drawn to each color in the stripes, but particularly how they are laid out together.  The dress is cut on the crossgrain so the stripes are running vertically, and I had to let go of stripe matching, and aimed instead for straight grainlines.


I used some organza as the neck and armhole facings, though if I make this again I will use bias strips instead. The facings are thin and therefore don't show through, but I don't like having to think about it.


I ran each seam through the serger after basting the dress together for fit.  Upon looking at the measurements I would up cutting a size 10 with a size 10/12 at the bust.  In the future I may go to a full size 12 in the torso, as I would like just a tad more breathing room.

a blurry but truer representation of thecolors :)
I wore this dress to two weddings in Boston earlier this month, and received compliments from both guys and gals, so I think it's a successful garment!  You can be sure I'll take this on vacation later this summer!


It has the LooCat seal of approval!


Wednesday, July 20, 2016

Made! - Self-drafted tulle skirt and Nettie bodysuit

Ya'll, it's been a year of weddings.  Husband and I have already attended 4, so naturally I had to make a new outfit for each.


Through the last few years of sewing I've figured out what silhouettes I like, what my style is.  But then there are moments like a few months ago when I decided that I needed to make a tulle skirt. Why? No idea. I spend my days in yoga pants, comfy dresses, and easy skirts - tulle is a little high maintenance. Add to it the fact that the tulle is mostly pink and it's like I don't know who I am anymore.

The inspiration came from the trim I used as the waistband.  It's a heavy linen with a beautiful embroidered design.  I decided that it should be the focus of the skirt.  The color of the tulle and bodysuit both come from the embroidery.


Layers (16!) of medium pink and apricot tulle are layered to achieve the color I wanted.  A quick gathered rectangle served as a lining.  Though I used the machine to attach the tulle to the waistband, the center back seam is sewn by hand with invisible thread.  Very time-consuming. Closure is achieved by snaps in the lining and buttons on the waistband.


Speaking of - check out those buttons! I've had them for years, waiting for the right project.


The Nettie bodysuit is made of some cashmere knit I found on sale at my local fabric shop. It is unbelievably soft and comfortable.  I learned that I need to shorten the armscye on this pattern considerably, as there was originally so much fabric that it bunched in a way that I couldn't just leave. So, after some creative pleating, I would up with this design, which not only shortens the armscye, but provides some interest and fits the style of the outfit.


Other changes I made to the pattern:
- lower the back neckline
- lengthen the sleeves by an inch

I think I'll make another post showing how I made the tulle skirt without a pattern, should anybody be interested! Part of me wants to make another one in black - what an interesting juxtaposition of a feminine fabric in a strong color!


Sunday, June 19, 2016

Made! - Performance Jumpsuit

Never thought I'd be one to ever wear or make a jumpsuit, but here I am - donning a garment I designed and completed almost a month ago.


The pants are from a Vogue knit pattern I've used previously to make a pair of performance pants.  They're made of the same material as this jumpsuit, and I perform in them and wear them to work. Nobody knows they are as comfortable as pajamas.

The bodice is made of two overlapping rectangles that form a wrap front.  I'm a fan of this design because it's incredibly comfortable and rather conservative from the front, but the back is nearly open, keeping me from getting too hot.  Stage lights can get really, really warm, so this is a plus! 


If you're wondering about whether or not the top will stay secure while playing, I wondered about that, too.  I wore this for two multi-hour practice sessions and am happy to report that not only did it stay up, but it didn't budge at all! 

There was some blue knit in my stash leftover from another project, so I decided to tack it onto the bodice wrap as a fun detail.  As much as I love black, sometimes it's nice to break it up a little bit. 

There are innumerable ways to tie the bodice, but here are some I've discovered that I like.

Halter with centered knot (ala loin cloth)


One shoulder with midriff cutouts


Cap sleeves

Back of cap sleeve version

Looking at these photos is a learning experience in what neckline and bodice styles are most flattering on me. I think the halter, though that's the intended design, is my least favorite on my shoulders.

Thanks to husband for taking pictures. :)

Monday, May 9, 2016

Made! - Vogue 1387

When I happened upon this Nicole Miller fabric, I immediately thought of my mom. It is full of her colors: turquoise, pink, and nice blends of green (which she doesn't necessarily love, but look gorgeous on her!).


It pairs perfectly with one of Rebecca Taylor's recent Vogue patterns: V1387.  I made View A, as I was drawn to the defined waist and the wrap style that allows for flexibility in terms of neckline.

The double pleats at each shoulder (which are missing from the line drawing...) allow for flattering drape in the front.  I staystitched each neckline edge, though it was not in the instructions. Without it I think there would be a gaping issue in the front.


The sleeve insets are really interesting! I've never made a top with them, but I might be adjusting every pattern to have this construction. 


Side seams are finished in the French style, and the narrow hem at the bottom looks particularly polished, if I can say so myself. Turquoise, being my mom's favorite color, contrasts yet blends with the print. 


The easy fit of this top allowed for easy pattern grading, as I had to estimate what size to make for my mom. This fabric also has a tiny bit of stretch, which will make up for any tight spots. 


I used bound buttonholes at the drawstring waist, as I thought normal ones would look a little too homemade for this material.  They are hard to spot in the print - but they're there!


Hopefully Mom will be able to pair this with denim, khaki, black, white, and just about any other color on the bottom. The print is rather expertly designed in that regard! 

Sewing Cat

Added a Creative Laurels label, and it was done! I found some clip-on earrings that complement the style and complete this Mother's Day gift. 


Hope she likes it!! Happy Mother's Day, everybody!


Wednesday, February 24, 2016

Made! - Marimba Spiritual tunic

What's a Marimba Spiritual, you may ask? I'll tell you.

It's a piece of music by Minoru Miki that I had the privilege of performing Monday night at James Madison University.  Scored for a marimba soloist (me!!) with percussion trio, the piece is one of the staples of percussion repertoire.  Though I've performed portions of this piece before, this will be the first time I'll play the entire thing. It's very exciting!!
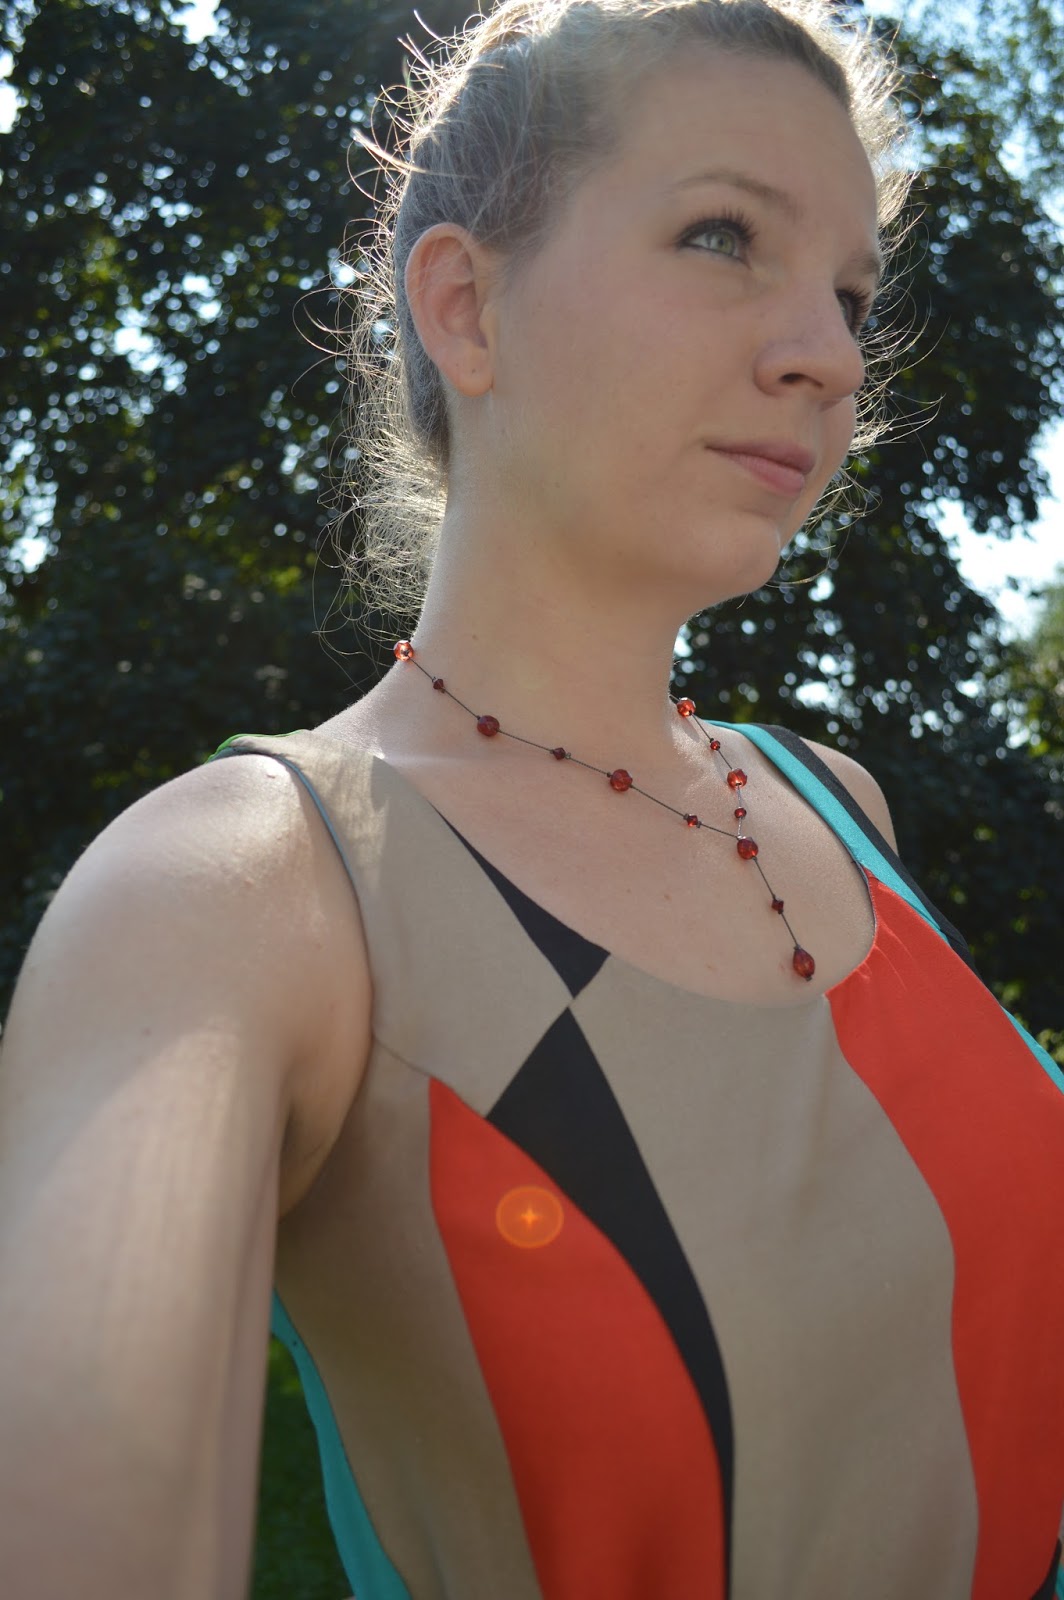
8am photos...
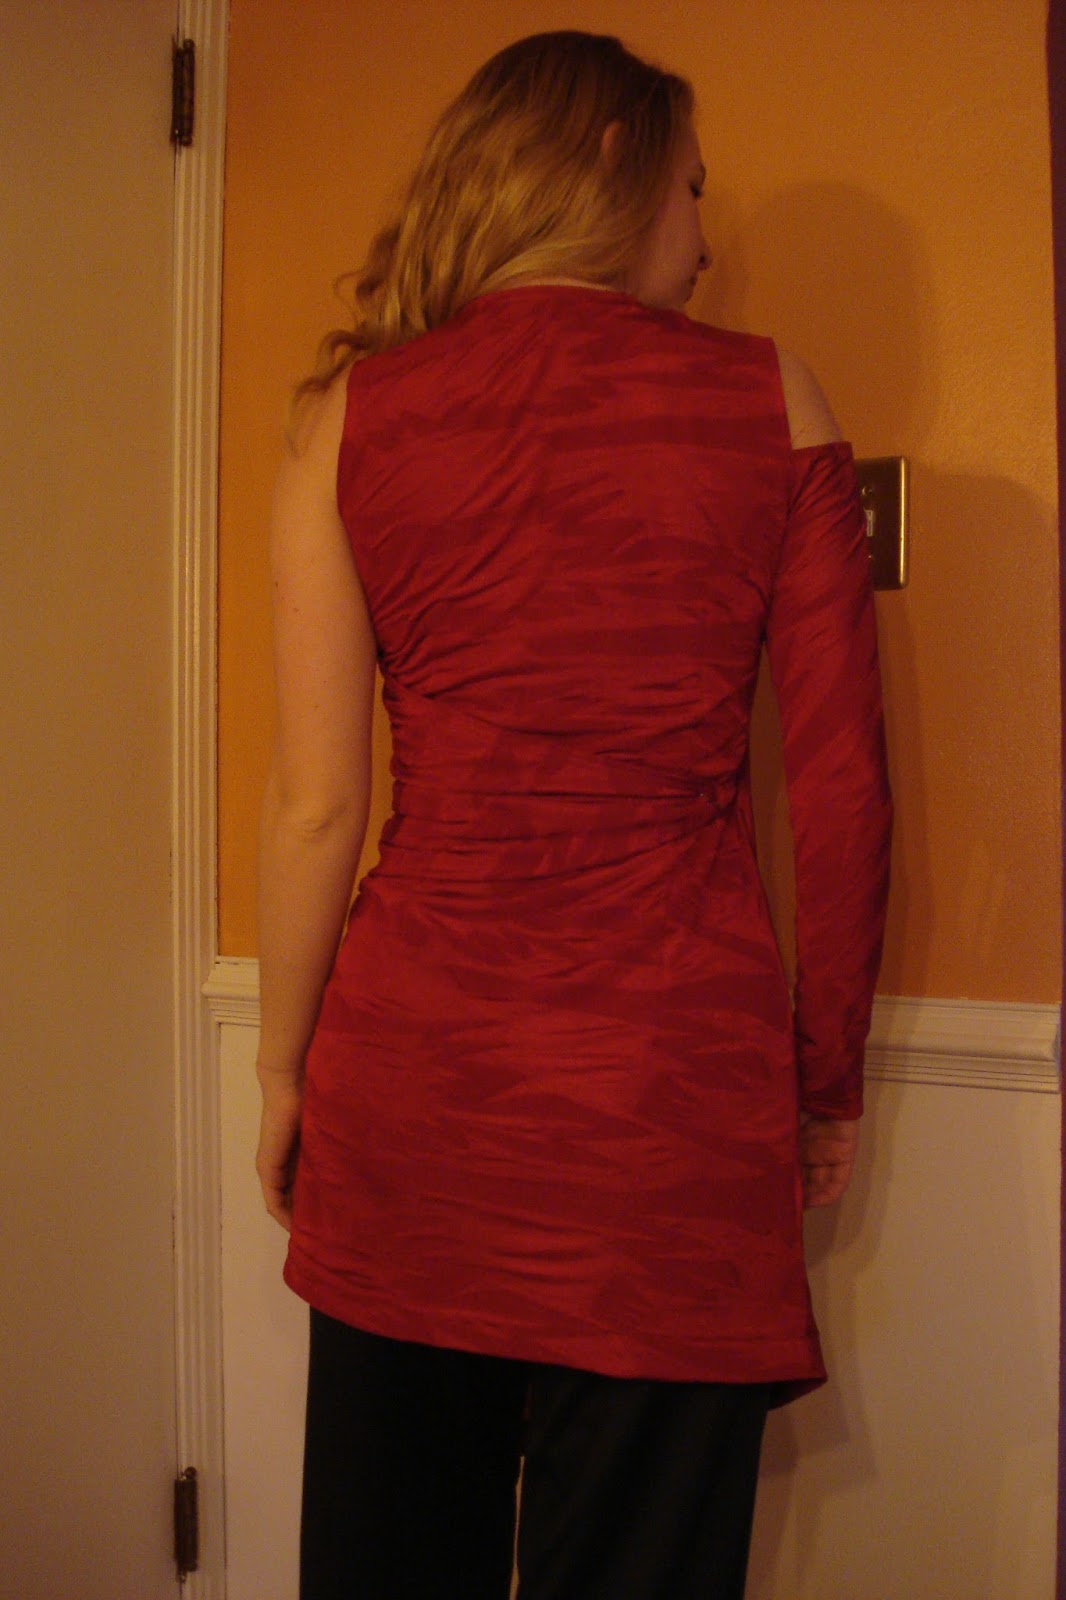
The back hem is supposed to be angled, which I rather like, actually.

As a musician and a maker, what else is there to do while prepping for a concert than making an outfit for said concert?  This tunic is my second version of Vogue 2064, an OOP Donna Karan pattern.


I've previously made View B with no changes, but this time I added overall length and combined it with View A. Though I love the one-shoulder design, I don't enjoy the anxiety (however faint) that comes along with it.  At concert time, though I trust my own sewing, I'd rather not worry about it flashing some side boob.  Phrases, dynamics, and musical images I'll worry about.  But wardrobe malfunctions?...I'll leave those to the pop stars of the world.  Side note: Do you think I'll get more random Google hits on the blog since I used the word "side boob"??

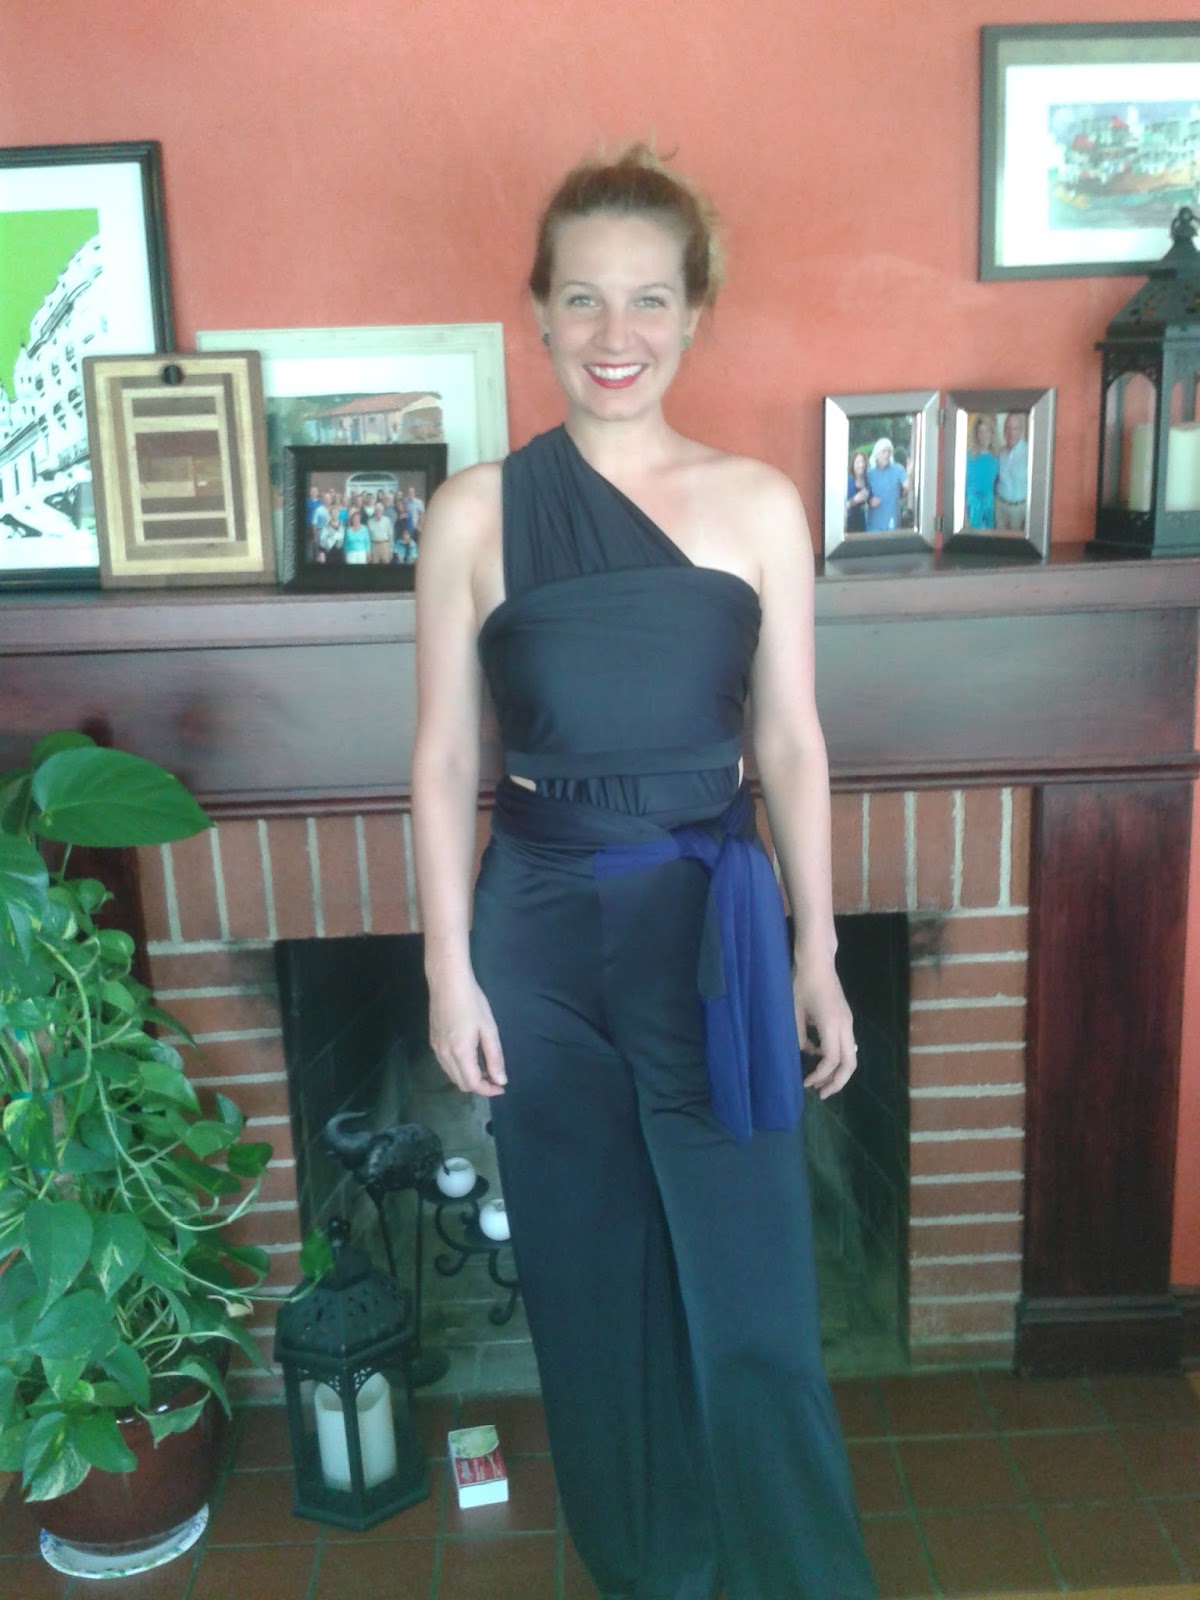
Close-up. The right front wraps over the left.

For my version, I used the left front of View A, folding under and stitching the armhole allowance rather than attaching a sleeve.  I enjoy the right sleeve in View B: it doesn't get in the way or pull on the bodice, since it's only connected at the lower armscye.  This means big reaches across the marimba, like I have to do in Marimba Spiritual, aren't at all inhibited by clothing.

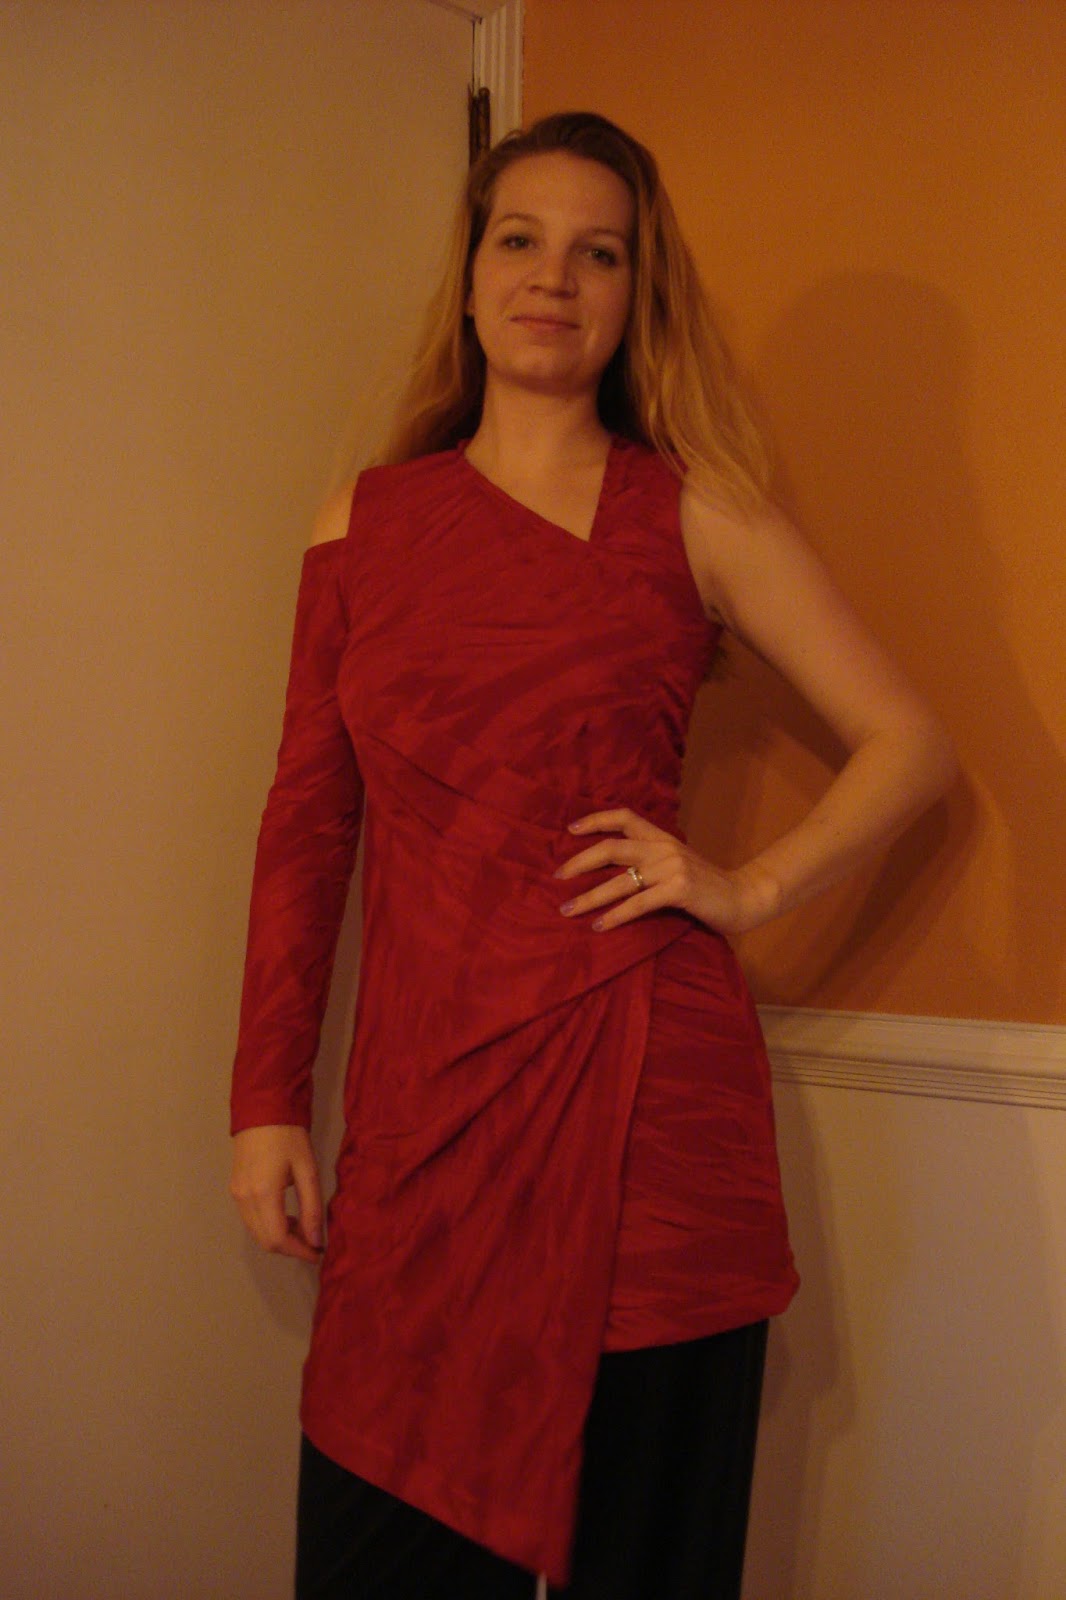
Here's an example of my first Vogue 2604 in action.

I love this shot! (Sidenote: This was back when I was lifting weights and running often - gotta get back to it!!)

The only tedious part of construction is adding almost 5 feet of thin elastic to the top edge. The instructions say to make a channel and then insert it through, but I found that the material wouldn't stop gathering as I did that, so I had to rip it out and just eye-ball it in place, gently pulling to stretch the fabric while I sewed the channel with the elastic already in it. I'll make sure to do this next time without trying the other method first.

This fabric is nothing sentimental. I think I bought it during one of JoAnn's Red Tag Clearance sales, so I paid maybe $8 for all of it.  I used a ball point needle on my machine for this, though it would be just as easy to use a serger.

Since this is a performance top and I knew I'd move around a lot, rather than using a hook and eye, as the pattern suggests, I attached the drape around the back with a safety pin or two. This way I knew it wouldn't go anywhere, and nobody sees it anyway.

I wore this top with  my concert pants, which I made a few years ago from View C.  You can see them in the photos. They are made of a thick, shiny ponte, which makes them look fancy from the audience, but nobody knows that they are perhaps more comfortable than my yoga pants! :)

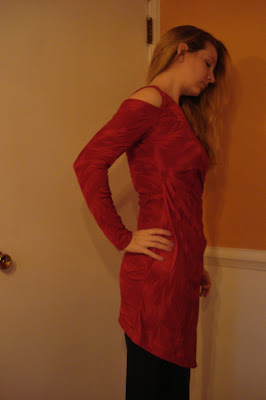
Here are the side views.

Left side

Right side

The concert on Monday was great! I was overall happy with the performance, and proud of the work the students did for all the rep, not just Marimba Spiritual.  I'll be making a video (*hopefully*) if I got some good audio and visual.  I'll also try to get some stills of this tunic in action!!

Yay, marimba and sewing coming together!!

Sunday, January 31, 2016

Made! - New Look 6343 present

Since I just posted about making this dress for myself, I won't go into much detail here about the one I made for my sister for Christmas.

I've had this fabric for years, always thinking I would make myself something, and then a few days ago it hit me that it is actually much more suited to my sister's coloring and preferred palette. The decision to make her a dress was easy! And since I was already infatuated with New Look 6343, it took no time to decide on a pattern.


For this version I decided to add cuffs to the 3/4 length sleeves, which will hopefully help keep her warm in the coming months. Here's a photo of the cuffs.  Have you noticed that if your elbows are covered, it seems like you might as well be wearing long sleeves?? Just me? Ok.


Just like for my version, I added shaping at the waist.
I will toot my own horn for a bit about how proud I am of the neck binding and how flat it lays.  This is also a nice shot of the armscye detail.

Arm detail in the lower right corner.

And lastly, here's a photo of the back. It lays really well and I managed to avoid awkward print placement with that weird brown splotch in the print...


While we're on the topic of print, I love this one but phewww it was a challenge to make sure there weren't accidental...highlights. ;)

I hope she likes it! I look forward to receiving a photo from her.