Showing posts with label fancy. Show all posts

Monday, September 25, 2017

Made! - Hack Vogue 8633 with maxi-length wrap skirt


Long wrap skirts have become a favorite garment.  You can make them to fit, but with some creative safety pinning you can change them to fit you at any point in life.  That's not the most glamorous point of view, considering I also enjoy the tailoring of men's shirts and couture hand-finishings, but sometimes a safety pin is all you need.  And we should admit that, mmm?


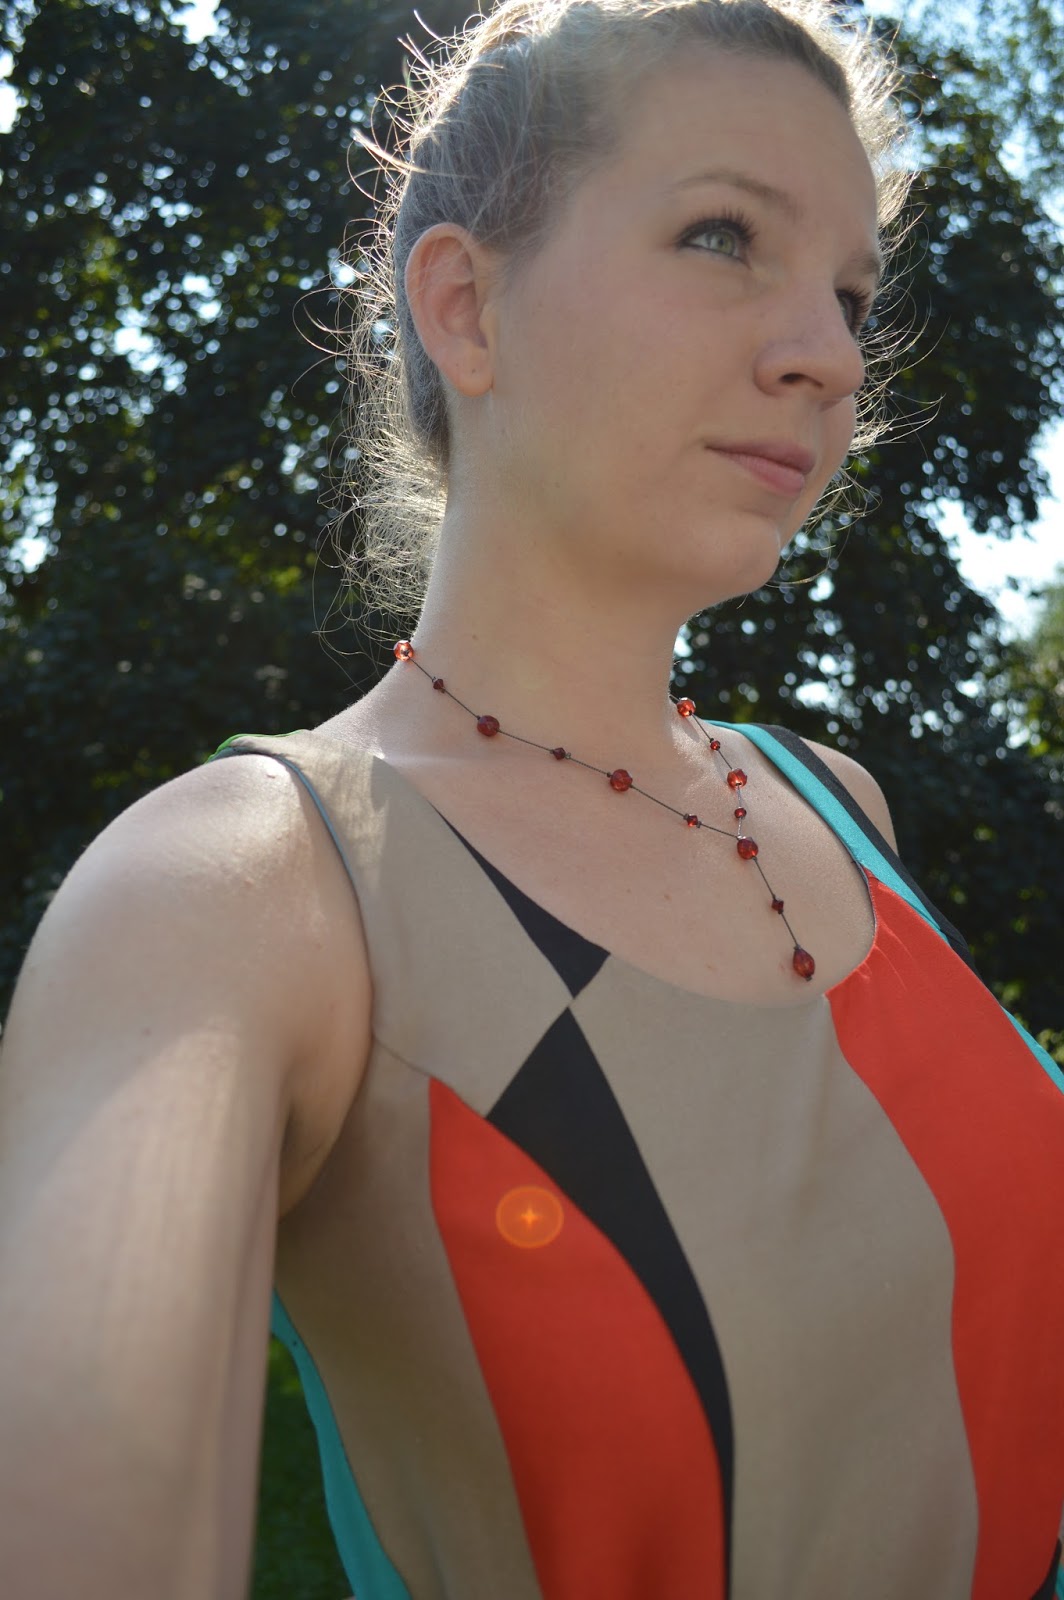
I made this dress for a family wedding.  The bodice, from Vogue 8633, is made of some upholstery fabric that I found and loved at my local fabric store.  The navy print I purchased in Utah while visiting my in-laws, and the coral satin underlay I bought locally on clearance.


Since the upholstery fabric is so thick, I didn't interface any of the bodice.  It stands up well on its own, and can be molded into different shapes at the neckline.  I prefer it curved down a little bit.


As part of my design, I chose to extend the back bodice around to the front and secure it with buttons on an angle, so that the bodice matches the wrap of the skirt.  This also kept me from worrying about a zipper.  It's lined, and the sleeves are bound in bias tape.


When attaching the skirt to the bodice, I used an inch allowance on the skirt so I could wrap the raw edges of the bodice.  Though it thickened the layers there a bit, I'd rather have that than scratchy edges.


Something I've contemplated is pinning up parts of the skirt to asymmetrically raise the hem, to make it friendly for warm weather.  The family wedding was outside, and this Tennessee September cooperated - it was actually a bit chilly! So, a maxi dress was just right for the temperature and breeze.


Anyway, this is my most recent make!  Not too difficult, not too easy.  Somewhere right between.

Saturday, April 1, 2017

Made! - Vogue 1516

When you're a professional musician, there's no such thing as enough black in your wardrobe.  Concert black is something I put on weekly, and even on days when I'm not performing, black-on-black is something that will always make you look put-together...no matter what, and is therefore a go-to when getting dressed in the morning.

Super-awesome flowy top courtesy of my mom on my 30th birthday.
Growing tired of my usual fare of black skirt or trousers, I decided to make myself something more unique! A pair of satin cigarette ankle-length pants.  I purchased Vogue 1516 for the pants as well as View B, the layered top, which I look forward to sewing!

Image result for vogue 1516
Vogue 1516 - Views B and D

The pattern is drafted for woven material, which is what I planned to use. There's a natural challenge here, as you have to decide if you want the pants to look great standing up or be comfortable sitting down.  Unless there's stretch in the material, you have to choose. Alas, alack, that's how it is.

My locally purchased crepe back satin is of high quality and zero stretch.  Knowing I was making these pants for collaborative piano performances I opted for the comfy-while-sitting fit. As a result, they are rather loose when standing.  In some ways I worry they make me look wider on the bottom than I actually am, but I love how well they fit when I sit down to play.  I know they look slightly shimmery on stage, and that they look like they fit really well - because they do!  I used the "wrong" side as the "right" side, because there's Oh look, they're shiny! and then there's Oh.....look. They're shiny.


In my efforts to not overfit, the waist is a tad bit more loose than I'd normally like. But, again, when I sit (and the belly, you know..."relaxes"...lol) they aren't too tight, which means sitting through an hour [or more] of playing is comfortable.  Always a plus.

I really like this design, and will make them again out of a material with stretch, so I can fit them a bit more.

I'm a fan of the seam running down the back of the leg.  It affords some nuanced fitting and looks great.  In the satin it provides a simple detail that adds to the "expensive factor."  I'm not one that cares if her clothes look expensive, as I'm of the mindset that if it fits, it's going to look expensive, but I do like when pattern, material, and fit really work together.


Husband helped take these photos when I got home from playing a recital for two clarinetists.  Nothing like a little Hindemith on a Saturday afternoon. (Musical inside joke, sorry.)

Embarrassing.

Look at them shoes!!!!!!!!!!! Nothing like a great clearance find, right?!

And for anyone really paying attention, yes! I cut my hair!  I make a tri-annual donation to Locks of Love. This time I donated 12 inches, and my hair has already grown quite a bit in the few weeks since I cut it.  My hair grows really fast. Like, disturbingly fast.  I figure the best thing to do with it is let it do its thing and then donate it to hopefully make a positive difference.

I'd like to find more things that help others, but there's only so many hours in a day. Looking forward to summer when I'll be able to make more of a difference!

Thursday, September 29, 2016

Made! - Simplicity 8019

It has been quite a while since I've shared some makes on the blog, mostly because I've been super busy! That's not to say there hasn't been sewing, as there is always sewing. Here are some of the exciting reasons I've been preoccupied.

I'm now teaching at JMU! It's nice to be in the academic environment again working with college level students, even if academia does have its fair share of "opportunities" right now.

A new chamber music project, L+M Duo, has officially launched and completed a debut tour in east TN: UT, Carson-Newman University, and Lincoln Memorial University.  Our instrumentation is marimba and piano - and we both play each instrument, which makes for very interesting programming. Our next concert is in November in Chicago. Brrrrrrrrrr

We also got to visit with each of our families in August, which was a real treat. Love them all.

I also turned 30. :)

Now, back to the sewing...

How I've gone this long without making a maxi skirt that included buttons is beyond me, as I love both of those things.


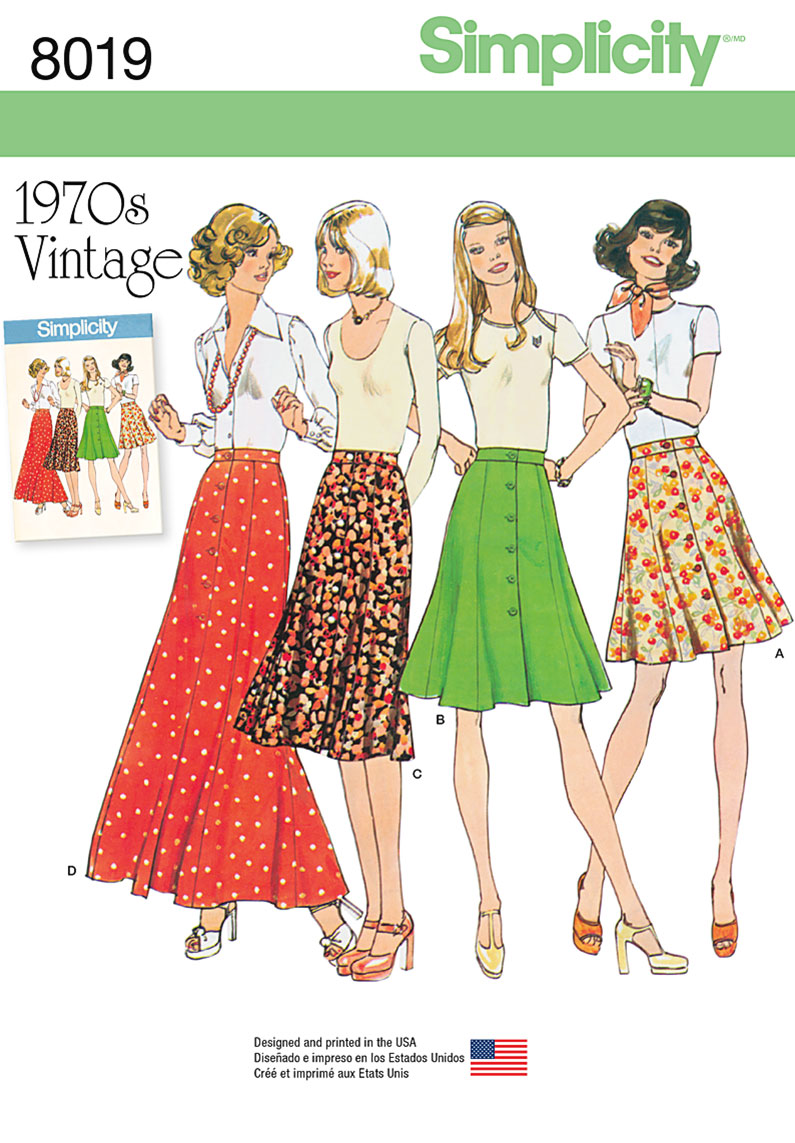
For this project, Simplicity 8019, a re-release from the 1970s, was perfect. It comes with four marked lengths.


The fabric is a black rayon challis bought at my local fabric store - woohoo, support local business!


I made it for a double family vacation in Florida, and it fared well.  I figured the humidity and a long skirt would be heavy, and while that was true, the tendency of every establishment to overdo the AC meant that I was actually quite comfortable.  This skirt is also a great one for flying, for the same reasons!

Slight alterations were made, from size grading to skirt lengthening.
Future changes:
  - add even more room around the front button band, as well as figure out how I want to tack it down
  - shape the waistband and use a bit heavier interfacing
  - lengthen the waistband to include a tab and button on the inside of the garment, as there's      otherwise slight pulling due to the horizontal button holes

Surprisingly, the pattern doesn't mention stay-stitching or any type of top-stitching for the button band.  Speaking of buttons...


The inside is done with all French seams, and the hem is a simple double hem, topstitched on the front.

The skirt works with a shirt tucked or untucked, which is great.  I'll probably be making more of these, as it was an easy project once the loooooooong pieces were all cut out.  You know how certain styles feel like that really suit different people? I've always loved long skirts.  I don't think they have to only be formal or dressy, though that's when we see them most often.  Nor do they have to be reserved for modesty only; in a fabric that moves, like rayon challis, they can be really flattering and attractive.  And, due to the  length, with the right styling they can be totally work appropriate.


Sunday, July 24, 2016

Made! - McCalls 6952

McCalls 6952, labeled as an Easy pattern, was just that.  It's a princess seamed, sleeveless dress in different lengths. I decided mine should be a maxi, and reach the floor when wearing flats.


The fabric was purchased a few years ago on a trip to Mexico, and I looooooooove it.  I was drawn to each color in the stripes, but particularly how they are laid out together.  The dress is cut on the crossgrain so the stripes are running vertically, and I had to let go of stripe matching, and aimed instead for straight grainlines.


I used some organza as the neck and armhole facings, though if I make this again I will use bias strips instead. The facings are thin and therefore don't show through, but I don't like having to think about it.


I ran each seam through the serger after basting the dress together for fit.  Upon looking at the measurements I would up cutting a size 10 with a size 10/12 at the bust.  In the future I may go to a full size 12 in the torso, as I would like just a tad more breathing room.

a blurry but truer representation of thecolors :)
I wore this dress to two weddings in Boston earlier this month, and received compliments from both guys and gals, so I think it's a successful garment!  You can be sure I'll take this on vacation later this summer!


It has the LooCat seal of approval!


Wednesday, July 20, 2016

Made! - Self-drafted tulle skirt and Nettie bodysuit

Ya'll, it's been a year of weddings.  Husband and I have already attended 4, so naturally I had to make a new outfit for each.


Through the last few years of sewing I've figured out what silhouettes I like, what my style is.  But then there are moments like a few months ago when I decided that I needed to make a tulle skirt. Why? No idea. I spend my days in yoga pants, comfy dresses, and easy skirts - tulle is a little high maintenance. Add to it the fact that the tulle is mostly pink and it's like I don't know who I am anymore.

The inspiration came from the trim I used as the waistband.  It's a heavy linen with a beautiful embroidered design.  I decided that it should be the focus of the skirt.  The color of the tulle and bodysuit both come from the embroidery.


Layers (16!) of medium pink and apricot tulle are layered to achieve the color I wanted.  A quick gathered rectangle served as a lining.  Though I used the machine to attach the tulle to the waistband, the center back seam is sewn by hand with invisible thread.  Very time-consuming. Closure is achieved by snaps in the lining and buttons on the waistband.


Speaking of - check out those buttons! I've had them for years, waiting for the right project.


The Nettie bodysuit is made of some cashmere knit I found on sale at my local fabric shop. It is unbelievably soft and comfortable.  I learned that I need to shorten the armscye on this pattern considerably, as there was originally so much fabric that it bunched in a way that I couldn't just leave. So, after some creative pleating, I would up with this design, which not only shortens the armscye, but provides some interest and fits the style of the outfit.


Other changes I made to the pattern:
- lower the back neckline
- lengthen the sleeves by an inch

I think I'll make another post showing how I made the tulle skirt without a pattern, should anybody be interested! Part of me wants to make another one in black - what an interesting juxtaposition of a feminine fabric in a strong color!


Sunday, June 19, 2016

Made! - Performance Jumpsuit

Never thought I'd be one to ever wear or make a jumpsuit, but here I am - donning a garment I designed and completed almost a month ago.


The pants are from a Vogue knit pattern I've used previously to make a pair of performance pants.  They're made of the same material as this jumpsuit, and I perform in them and wear them to work. Nobody knows they are as comfortable as pajamas.

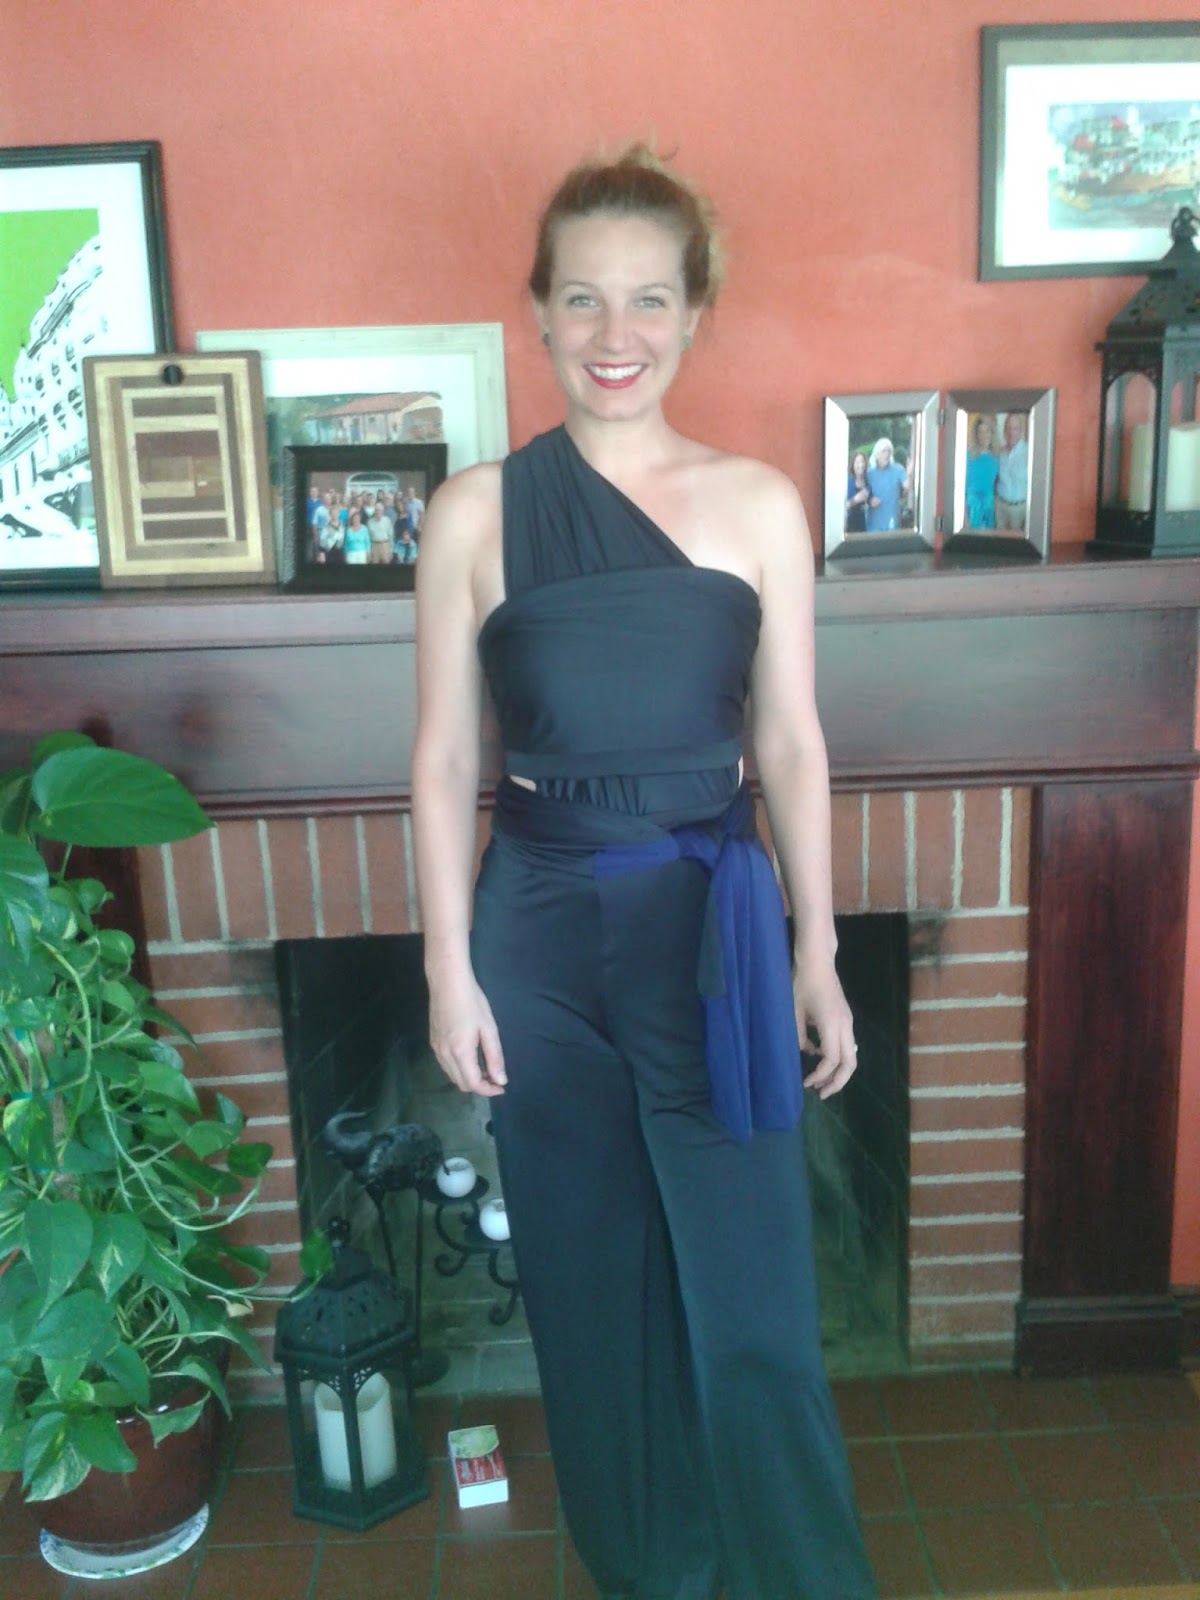
The bodice is made of two overlapping rectangles that form a wrap front.  I'm a fan of this design because it's incredibly comfortable and rather conservative from the front, but the back is nearly open, keeping me from getting too hot.  Stage lights can get really, really warm, so this is a plus! 


If you're wondering about whether or not the top will stay secure while playing, I wondered about that, too.  I wore this for two multi-hour practice sessions and am happy to report that not only did it stay up, but it didn't budge at all! 

There was some blue knit in my stash leftover from another project, so I decided to tack it onto the bodice wrap as a fun detail.  As much as I love black, sometimes it's nice to break it up a little bit. 

There are innumerable ways to tie the bodice, but here are some I've discovered that I like.

Halter with centered knot (ala loin cloth)


One shoulder with midriff cutouts


Cap sleeves

Back of cap sleeve version

Looking at these photos is a learning experience in what neckline and bodice styles are most flattering on me. I think the halter, though that's the intended design, is my least favorite on my shoulders.

Thanks to husband for taking pictures. :)

Tuesday, April 5, 2016

Made! - Simplicity 1541 and 1690, New Look 6343

Here they are, the last of my winter makes.

These were sewn for different occasions, from a special concert to Easter Sunday.

New Look 6343

Here's a pattern I've made twice already, once for me and once for my sister. Here is a winter verison, made up in a really comfy sweater knit I purchased at Ragtime Fabrics, my local store (that's only about a mile from my house). 

welcome to our living room!
I didn't worry too much about stripe matching except on the side seams. I wish I'd thought through the sleeves a bit more, but at least the sleeves match each other, even if they don't match the main part of the dress. 

I'm very happy with the result of my neck binding, though. I also edgestitched the armscye using a tiny zig-zag stitch.


Simplicity 1690

This pattern needs no further discussion here on the blog, considering there are previous makes - some blogged, several unblogged.  This version was for husband's solo recital at the university. I accompanied him on his Marimba Concerto no. 2 and played Jacob TV's Body of Your Dreams.  You can watch a video of me playing that piece here, but it's from a different concert.

I used some leftover fabric from a previous gift to my sister - and I looooove it. I added little purposefully messy cuffs on the sleeves for interest.  The sleeves are also lengthened by an inch so the fabric has a chance to drape nicely over the arm.


For the concert, I paired this top with my concert skirt, previously blogged about here.  This skirt is a TNT for concert days!


Simplicity 1541

This was my first time using one of the AmazingFit patterns, and I must admit that this skirt fits really well.  I made View C and followed the cutting and sizing instruction for the "Curvy" pattern. The main difference is that there are four darts in the back rather than the standard two.


I used less than a yard of fabric to make this, which asserts this pattern's place as one of the most amazing EVER.
Here's a close-up of the front princess seams and waistband.


I cut a size 12, used standard seams, and took out a tiny bit of length out of the center front to prevent the waistband from sagging. (I take this to mean that all of my curves are on my sides and in the back...lol)

There's a center back zip, and all edges are serged to prevent fraying.  To keep as much length as possible I used a scrap as hem facing, and I like the little detail and pop of color that can sometimes be seen, depending on how I move.


 Rather than slipstitching the waistband facing, I pressed under the edge and stitched in the ditch on the right side of the garment, catching the facing as I went.  It's my new favorite method.


Currently Sewing

Right now I'm working on a muslin for a button-up shirt for myself.  After making so many for my husband, I decided it was my turn! I'm learning a lot about my own shape, as well as where I want the ease to be.  I avoid RTW button-ups because the ease is never in the right place for me. I hope to remedy that through this muslin process!

Wednesday, February 24, 2016

Made! - Marimba Spiritual tunic

What's a Marimba Spiritual, you may ask? I'll tell you.

It's a piece of music by Minoru Miki that I had the privilege of performing Monday night at James Madison University.  Scored for a marimba soloist (me!!) with percussion trio, the piece is one of the staples of percussion repertoire.  Though I've performed portions of this piece before, this will be the first time I'll play the entire thing. It's very exciting!!

8am photos...
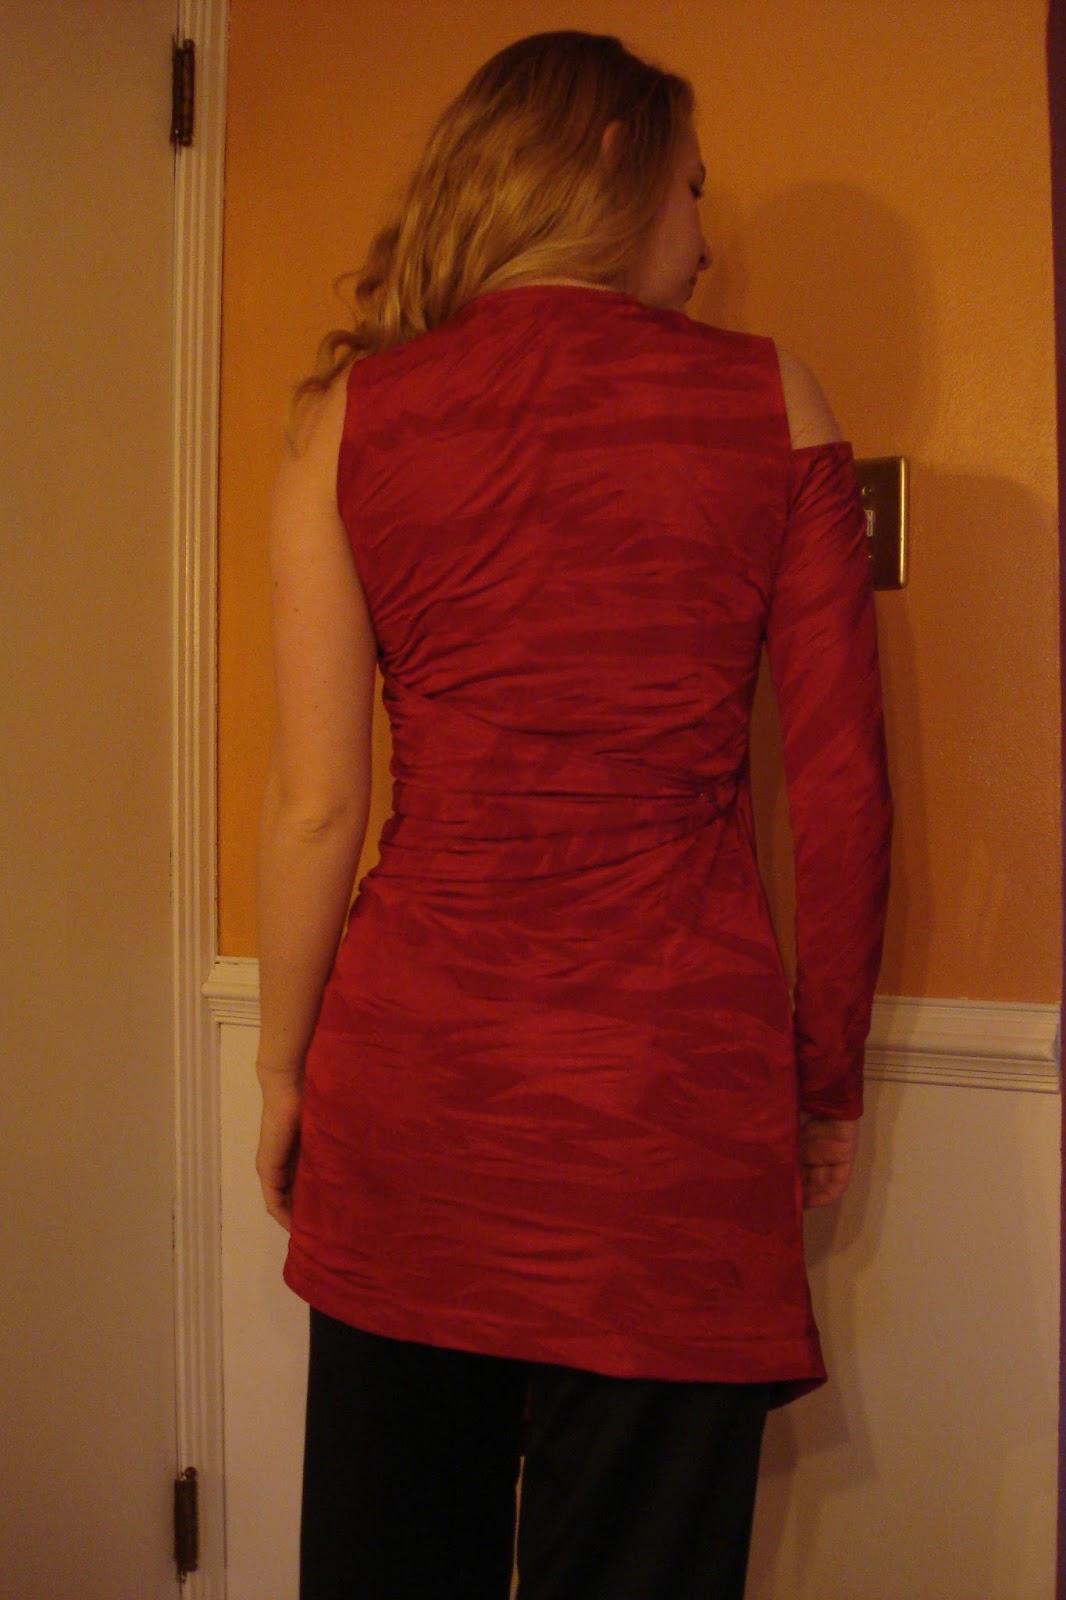
The back hem is supposed to be angled, which I rather like, actually.

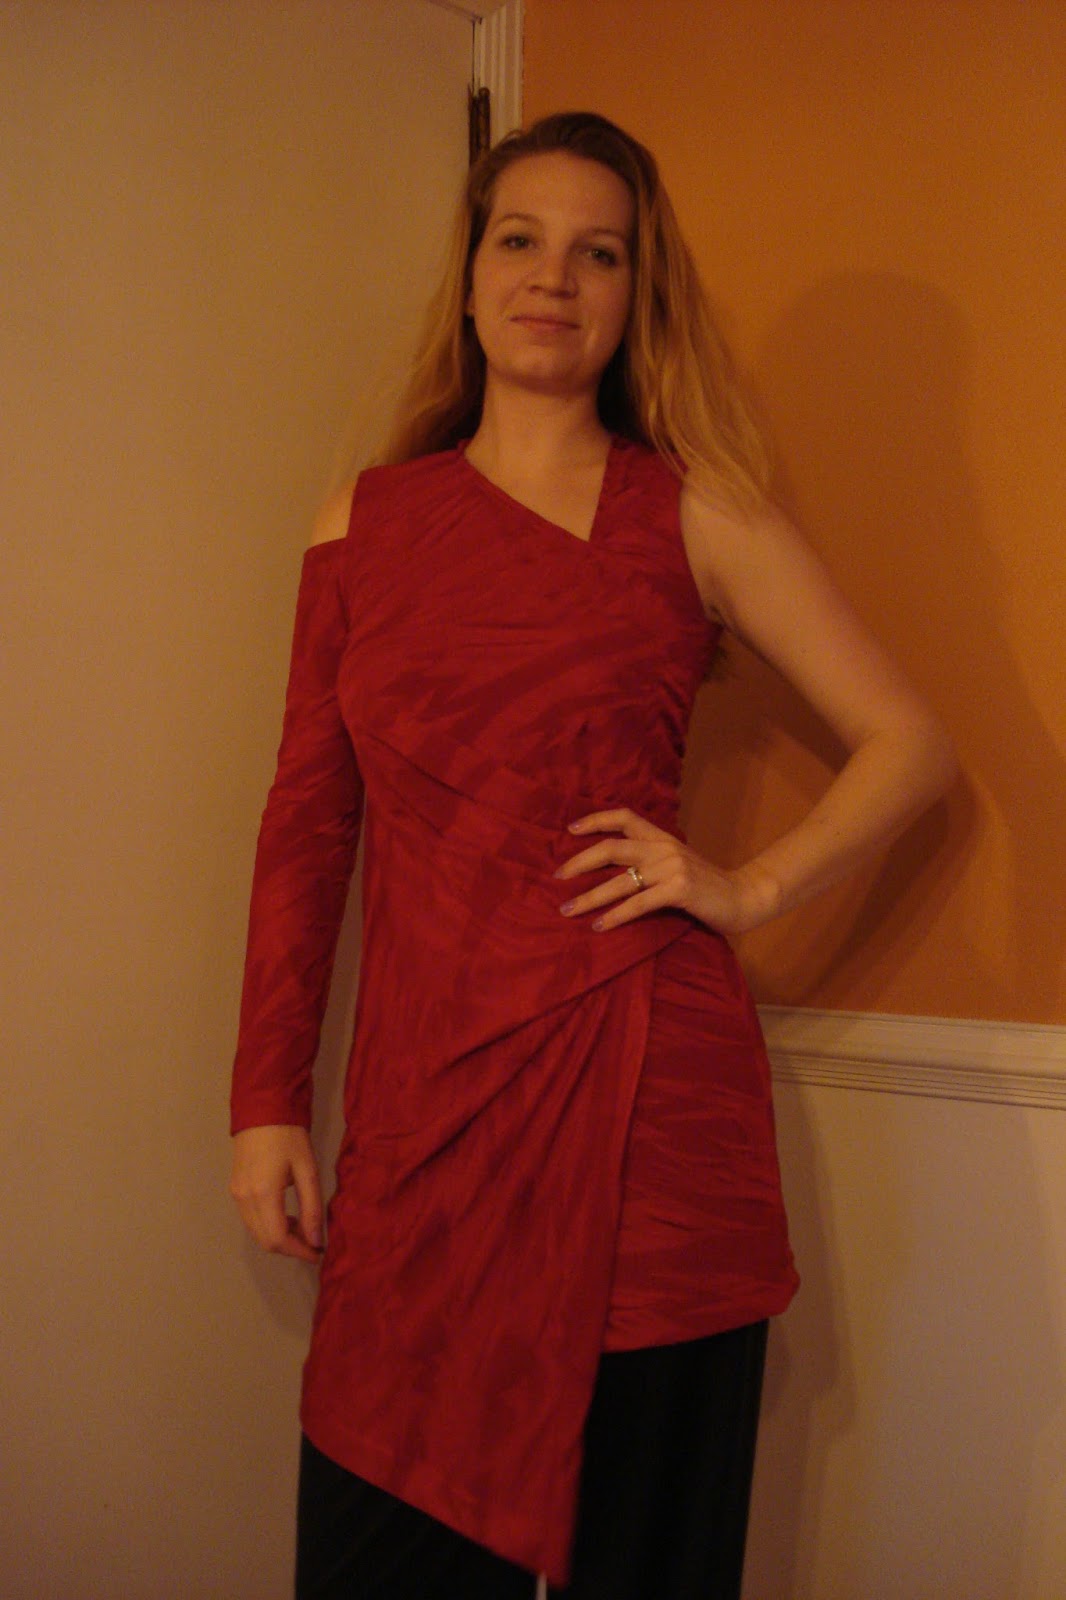
As a musician and a maker, what else is there to do while prepping for a concert than making an outfit for said concert?  This tunic is my second version of Vogue 2064, an OOP Donna Karan pattern.


I've previously made View B with no changes, but this time I added overall length and combined it with View A. Though I love the one-shoulder design, I don't enjoy the anxiety (however faint) that comes along with it.  At concert time, though I trust my own sewing, I'd rather not worry about it flashing some side boob.  Phrases, dynamics, and musical images I'll worry about.  But wardrobe malfunctions?...I'll leave those to the pop stars of the world.  Side note: Do you think I'll get more random Google hits on the blog since I used the word "side boob"??

Close-up. The right front wraps over the left.

For my version, I used the left front of View A, folding under and stitching the armhole allowance rather than attaching a sleeve.  I enjoy the right sleeve in View B: it doesn't get in the way or pull on the bodice, since it's only connected at the lower armscye.  This means big reaches across the marimba, like I have to do in Marimba Spiritual, aren't at all inhibited by clothing.

Here's an example of my first Vogue 2604 in action.

I love this shot! (Sidenote: This was back when I was lifting weights and running often - gotta get back to it!!)

The only tedious part of construction is adding almost 5 feet of thin elastic to the top edge. The instructions say to make a channel and then insert it through, but I found that the material wouldn't stop gathering as I did that, so I had to rip it out and just eye-ball it in place, gently pulling to stretch the fabric while I sewed the channel with the elastic already in it. I'll make sure to do this next time without trying the other method first.

This fabric is nothing sentimental. I think I bought it during one of JoAnn's Red Tag Clearance sales, so I paid maybe $8 for all of it.  I used a ball point needle on my machine for this, though it would be just as easy to use a serger.

Since this is a performance top and I knew I'd move around a lot, rather than using a hook and eye, as the pattern suggests, I attached the drape around the back with a safety pin or two. This way I knew it wouldn't go anywhere, and nobody sees it anyway.

I wore this top with  my concert pants, which I made a few years ago from View C.  You can see them in the photos. They are made of a thick, shiny ponte, which makes them look fancy from the audience, but nobody knows that they are perhaps more comfortable than my yoga pants! :)

Here are the side views.

Left side

Right side

The concert on Monday was great! I was overall happy with the performance, and proud of the work the students did for all the rep, not just Marimba Spiritual.  I'll be making a video (*hopefully*) if I got some good audio and visual.  I'll also try to get some stills of this tunic in action!!

Yay, marimba and sewing coming together!!