First things first, everybody: I made this top a long time ago. I think it was my mental release during my month of recitals at the university. Seriously, I finished this in April and have worn it several times, sometimes with white jeans, other times with dark denim shorts. (I apologize that these photos are all on the dress form. I was tired and the husband was in a mashed potato coma: ergo dress form photos.)

I LOVE saris and other traditional Indian garments, so this top is my generic American nod to all beautiful Indian pieces. I would wear a sari to work, but everyone would have to talk to me like the queen I would assume to be. Something about draping one's self in colorful, luxurious fabric brings about the regal in anyone, am I right? Anyway, moving on.
The Pattern
For this project I used New Look 6187, and made View A.
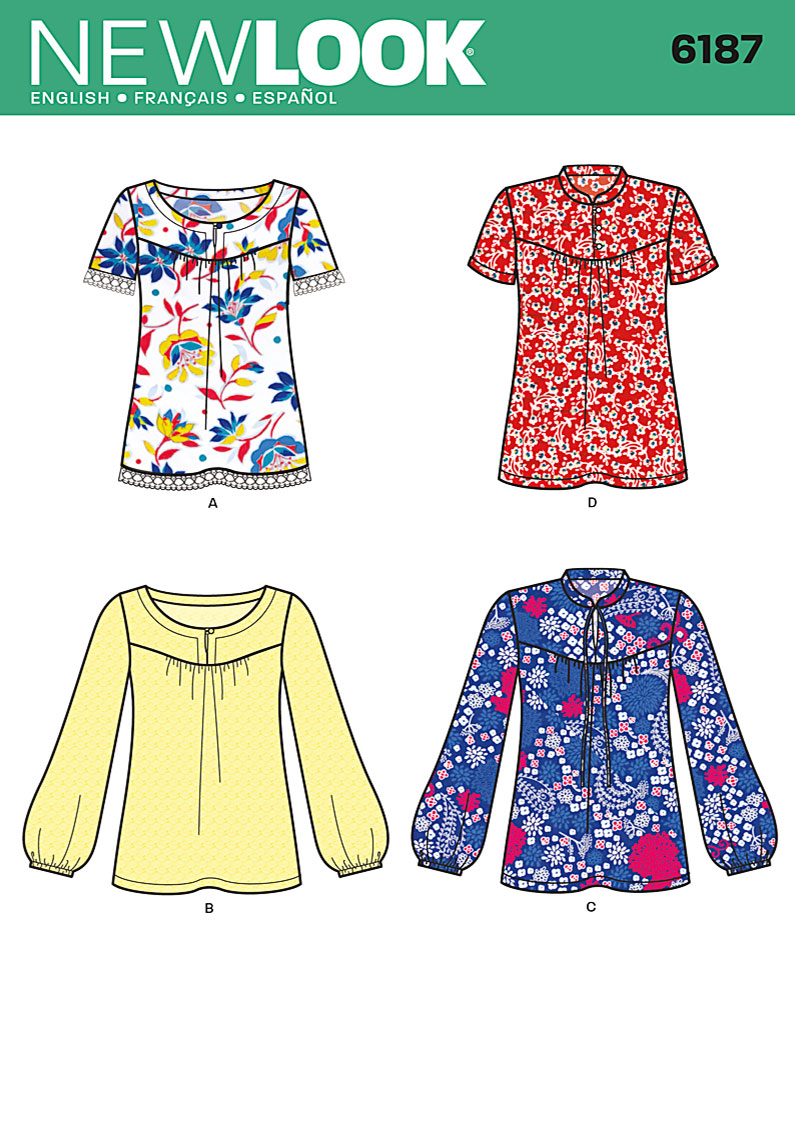
I like the open neckline and short sleeves on this pattern. Sleeves have long been my nemesis, so I'm attempting them every so often to try to improve my technique with them. As soon as I cut the pattern pieces I noticed that there was hardly a waist in the top, and knew that my main alteration would be to take in the waistline to create an actual shape rather than a baggy tent. Though one can love a pattern for its simplicity (wow, I feel like I just got that whole marketing ploy), it can still be flattering!


Note: the sleeves are actually balanced and even, though they don't appear to be in the above photos.
My two additions to the pattern: a back yoke and a waist tie. We curvy types like to emphasize our waists.
The Fabrics
This project was the second in my series of "use the stash" projects, the first being my Easter dress. The pastel turquoise peachskin was left over from a tunic I made for my mom last year, and the magenta brocade on top was an impulse "buy the bolt" purchase at a 50% off Red Tag fabrics at JoAnn's over a year ago. I had just under a yard of the brocade before this project. It has a lovely border print that I cut and added as edging for the sleeves.

I had to meticulously cut and even more meticulously sew the edging perfectly straight onto the upper sleeve. I'm happy with how it turned out. You can see the seam just above the tiny row of gold circles about 3" from the sleeve hem.
The details of this top are what makes it so special. I carefully cut the brocade so that it's a mirror image of itself from the center front and center back, down to the sleeve edging!
|
| Check out that center front! Gloriously placed prints, if I can say so myself. |
My choice to add a back yoke had to do with a couple of things: 1) I love the colors in the brocade and wanted to use it; 2) I didn't have enough turquoise to cut View A as instructed; and 3) when I'm sewing I do what I want. Honestly, I like the back yoke! It really lets the beautiful fabric take center stage (especially now that my hair is short)!
|
| The left sleeve is true to the shape of the garment; the right one is all layin' funny... |
When creating a back yoke I decided without much thought to make it lower in the back than in the front, making the lower edge even with the dip of the front yoke and just about even with the sleeve edging. It makes the top feel complete, like it was done on purpose. Which is waaaaaaaassss, but you know, it's nice when it looks that way, too.
The waist tie was a freestyle draft. I pretty much used the longest length of turquoise fabric I had left, tacked on some brocade, and called it a day. The specificity of the tie makes the top look even more polished than before. I thought about just using my beige skinny belt, but in the end the fabric tie won. I don't have complaints.

I used the flash in this photo to try and capture the slight sheen of the fabrics. They are both subtle, even the brocade - to, you know, be a brocade.
The top fits me well, and I will probably use this pattern again, but not before I go through a few other 30 patterns in the stash. Seriously, guys, I have so many projects lined up I could sit in a hotel room last week and start listing them with no problems at all.
Fabric, pattern, occasion, alteration = over and over for about 15 projects. Off the top of my head.
Sewing is an addiction.
Anyway, if you've noticed a slight change in background scenery in my photos it's because there are taken in my still messy, still institution-white sewing room. We just moved in and I haven't had a chance to get settled. But the machine was up and running 24 hours after moving in here, I tell you. I have plans to paint the walls and get crafty and thrifty about organizing the space. It's small, but that's perfect for me.
Smaller space = less surface area for cleaning, and that makes me happy.
I'm excited to share my new space once it's done! Yay!