Showing posts with label beads. Show all posts

Tuesday, January 19, 2016

The Family Gathering Dress

It's been a long time coming, ya'll...


I'm rather excited to share photos of the Family Gathering Dress, which I finished in May of 2015. Life got in the way right after that, between competitions, moving, new jobs, a new (to us) house, and traveling.

Back view

I draped the pattern myself, and am almost happy with it.  Not going to go about listing the parts I don't like - instead, I'll point out the parts that I do!  One lovable thing: the well-fitting curve of the shoulder band!

As written before, the print placement took a long time to figure out.  It takes up the entire 60 inches of width, which makes it glorious for a maxi dress such as this.  There was no print matching, only matching of basic areas of the design, such as the dark blue curves all being in roughly the same place.

Photo attempt before enlisting husband's help!


Close-up of the waistband
The print design at the side seams came out beautifully. I almost love them more than the front and back!

Left side seam

Right side seam - with slit for walking!

The most special part of this dress is the beaded left shoulder.  Certain areas are highlighted with red, gold, turquoise, white, silver, or bronze beads.  I used clear thread to attach them, and I can't tell you how long it took to sew them on. A long time!

It's difficult to get a good photo of them on a winter evening..


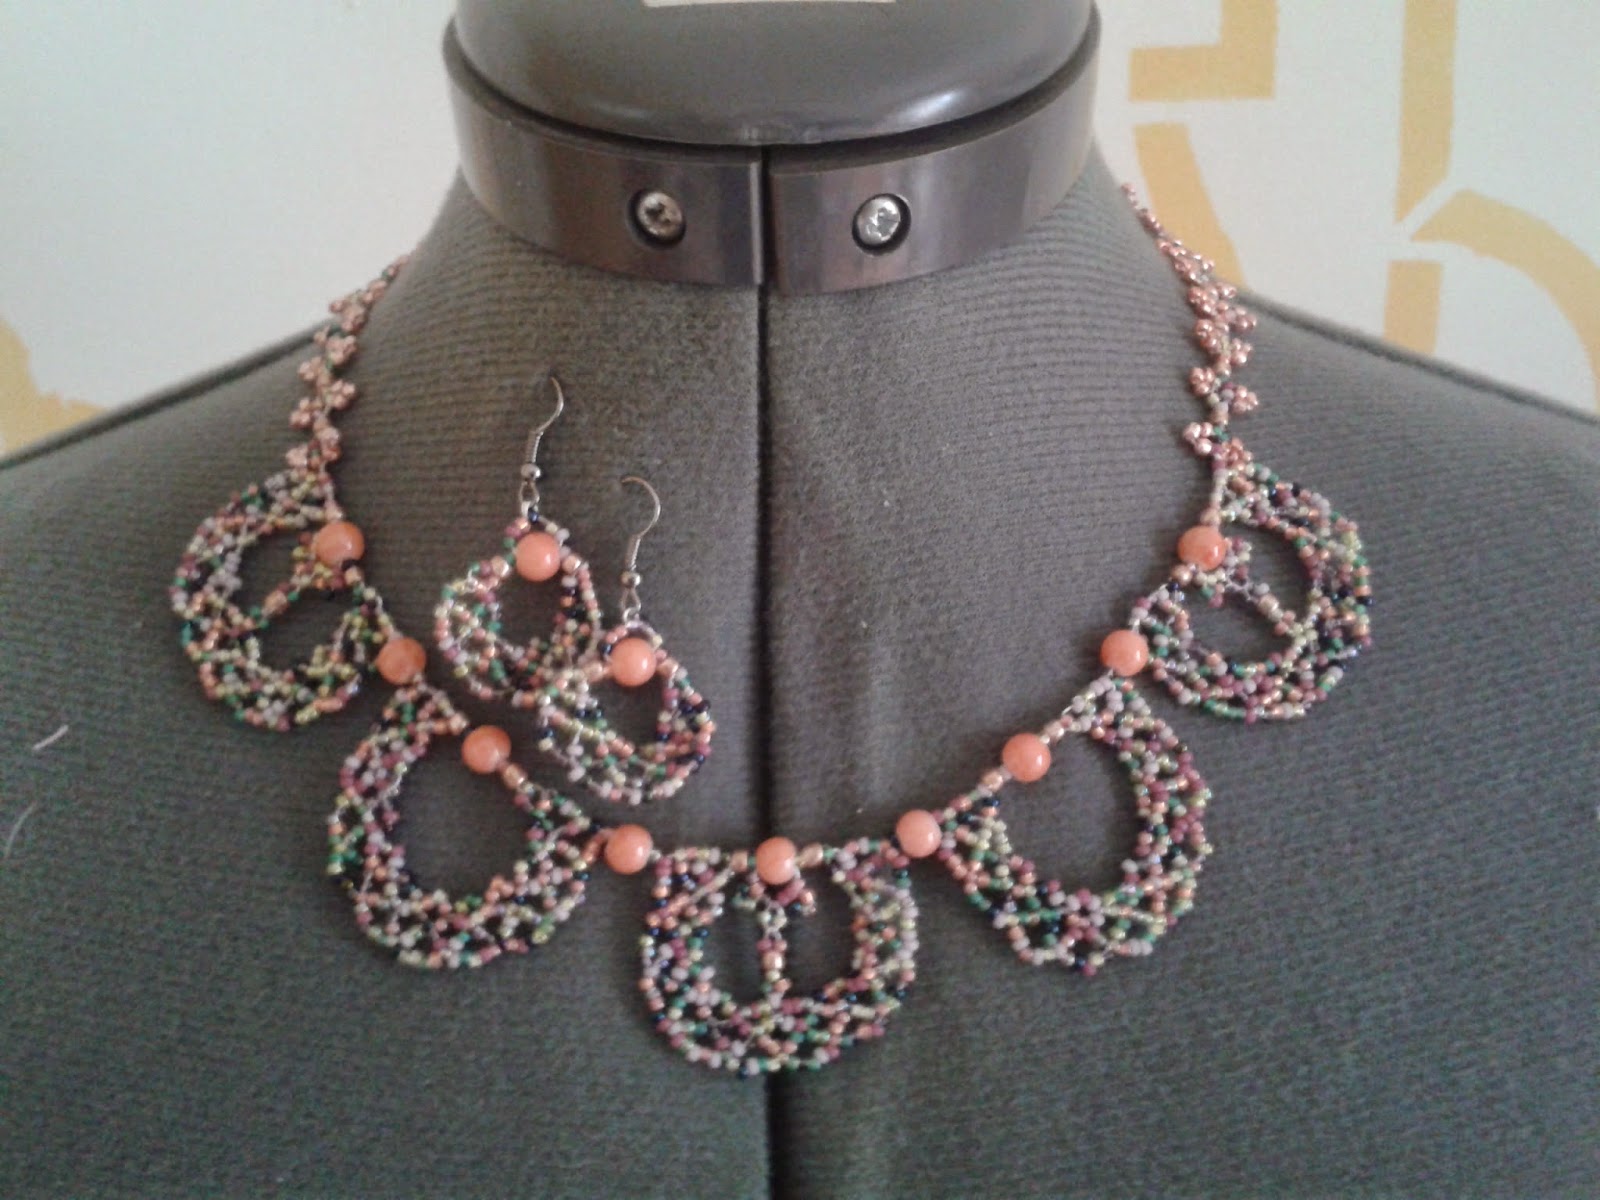
You can also see the earrings I designed to match the dress. :)

Beads are concentrated at the left shoulder and gradually lessen towards the center front and back.  The last beaded area is in line with my chin, which is hopefully observable now that I've pointed it out.  The circle burst where the bodice meets the band is adorned with Swarovski crystals.

The photo below (from a previous post) shows a clearer picture of the vivid colors of this material.


And here's a close-up of the earring design.


The dress is fully lined, with lots of slipstitching to secure raw edges on the inside of the garment.  The invisible zip is light blue and on the left side of the bodice.


Luckily, I have a good length of the print leftover.  It was purchased in Mexico, so there wouldn't be any quick trips to buy more.  I'll have to think hard on what to make with it next. :)

If you'd like to follow the long progress of the making of this dress, you can check out my previous posts:
-  Designing and Cutting
-  Bodice Assembly
-  Beading and a Sneak Peek

I made this dress for the Family Gathering, which is the time when mine and husband's families officially met.  Our only regret about eloping is that our families weren't there with us.  But! Setting aside a weekend in all of our schedules that was about nothing but spending time together meant that everyone got to know something special about their new extended family rather than hurrying from ceremony to reception to hotel to airport.  We're really happy that everyone was able to make the trip.

Wednesday, June 10, 2015

Family Gathering Presents

My, my, my, I still owe pictures of the Family Gathering Dress, don't I?

I'll get to it...eventually. Between preparing for the competition, traveling for weddings, and trying to buy a house life is a little hectic right now. 

So...going through photos on my phone today I realized that I never shared the beaded gifts I made for the ladies of the Family Gathering. 

In the decorated mini gable boxes, which I blogged about before, ladies found a little package that looked like this:


In no particular order, here are the various projects I gifted during the weekend. (I realized today that I missed a pair of earrings. DOH!)

For my sister-in-law: decreasing brick stitch gathered into a diamond-arced leaf

For Nana: a self-drafted lariat necklace to match one I made previously. The circular motif you see is taken from the book A Beaded Romance, by Kelly Weise

Lariat necklaces with a formed loop like this one are great for those that like jewelry but have fingers that no longer enjoy working with tiny clasps. (Yes, I'm one of those people.)

For my sister-in-law: I designed these based on what she wore the last time husband and I visited in Utah. Is that creepy? hmm....

For my sister-in-law: This is the only member of the family I haven't met, but in photos I've seen she's wearing these colors. This is only of my own, simple designs.

Top Left: for Grandma
Top Right: for my mother-in-law
Bottom: for my sister

For Grandma: I designed these earrings using brick stitch (yep, the same as the first dark pair of earrings!!) based on her skin tone and affinity for gold jewelry.

For my mother-in-law: These are an extracted circular design from Kelly Weise. 

For my sister: I've had these brown/mustard beads for over a year and the Family Gathering gave me an excuse to FINALLY make this bracelet for my her.


Simple Handmade Gift Wrapping

I'm a big fan of using fabric scraps as wrappings for gifts. I'm known for wrapping up jewelry in quilt batting (as I did here), fleece strips (see: Christmas 2014), and tying up packages with leftover bias binding or yarn that matches the crocheted gift inside. Yes, part of this is because my hippie self likes using what I have over purchasing ribbons and things, but also because I have to travel for every gifting holiday, and yarn doesn't get squished. ;)

When it comes to beaded jewelry, if you don't wrap it in voluminous fabric it will probably get smushed. Trust me. I learned this the hard way.

Using fleece or batting, poke the earring wires through the material. I like to fold it over to protect the wire on both sides.

Then, fold one third over on top of the jewelry.


Fold the fabric at the bottom up towards the top to add even more padding on top of the beads.


Then, fold the extra square to the left behind the thick, center square. By folding it behind, you protect the beads from all sides. Hooray, no broken beads!


Lastly, tie a ribbon around it. Preferably a pretty one. And give to the lucky recipient!! <3


I found this ribbon at Hobby Lobby on the cheap, like 20 cents for the roll. I have mixed feelings about Hobby Lobby...but that's a different post. :p

Thursday, May 7, 2015

Family Gathering Dress - part 3

Much has been done since my last post about the FGD.

The skirt and waistband are attached.
Side invisible zip is inserted.
Inside linings are slip-stitched to the zipper and waistband seams.
The side slit edges are hand-sewn together for a clean and effortless line...with NO visible stitches!

Here's a sneak peek of the bodice, waistband, and skirt. I love the print placement!!


In my efforts to keep the finished product somewhat of a surprise, pictures from here on out are going to be stealthy and probably weird and low-quality. I would take dress form photos if my form had collapsible shoulders, but since it doesn't, once the zip was put in it was too small to slide on. So, awkward lap pictures it is!


BEADS.

What I've been doing slowly and in little spurts for days is adding beads.

Beads, beads, beads. Beads of all shapes, beads of all colors. The goal is to just bedazzle the entire left shoulder as much as possible.

Here's a progress shot without giving away too much. :)

The facing is the green fabric above. It and the allowance near my hand will be turned over and slipstitched on the underside.

I am so excited about this project. The red beads were the last ones I bought, mostly because I was anxious about being able to find the "right" red, if that makes sense. Often, red seed beads can look cheap if they aren't saturated enough with color. Around here it's difficult to find anything specialty in that regard.

Husband is so nice that when he ran errands the other day I asked him to buy some for me. Knowing I'm particular he sent me a photo of all the red beads for sale (admittedly only two kinds) so I could pick them out. So good, that husband!

I am excited that I already had most of the other beads I'm using left over from previous projects. Yay for recycling!!  And hooray for a cohesive color palette!

I even purchased some Swarovski crystals on sale to add some extra sparkle. The plan is to save some to make a complementary pair of earrings...if I have time. :)


My Process

Luckily, beading goes by pretty quickly. I like to cut one arms-length of invisible thread, thread a needle and double it, then knot both strands. This does make for a workable length of about 14 inches, and yes, you need much more thread than that for the whole project, but in the event that it breaks or snaps you don't want 643 beads flying everywhere when it could only be 113 beads.

(This logic is based on an advanced logarithm involving my own clumsiness, life's happy accidents, and random bad luck.) LOL

Loo is upset she isn't allowed in the sewing room right now. With little containers of beads on the table I can only imagine what would happen if she decided that she needed to sit up there, too. Oh, Loo. She sits outside the door and talks to me, sometimes gets a little whiny. Good thing spring is here - I let her outside and she's happy for hours!


The Unintentional Leave of Absence

I didn't mean to have a three week break between posts. In fact, I've been very busy with sewing projects! The truth is, though, I've just been really busy.  I'm not particularly proud of being a busy person, but that's how it goes this time of year.  We've had 7 concert in 9 days, plus juries, plus final exams, plus a house-hunting trip to our new city.  "Busy" barely covers it. 

Thankfully, with the presentation of those final concerts life is now much easier.  Now, rather than preparing 4 recitals, I can concentrate on the marimba competition in June! It never stops, I tell you.

If you want to know more about these performances, you can check out my music blog at laurelblackmusic.blogspot.

Sunday, August 31, 2014

Presents for Nice People

Much has happened since my last post.

I finished a dress I've yet to tell you about. Classes have started at the university.  My parents bought us a washer and dryer (!!!!!!!!!!!!!!!!!!!!!!!!!!!!!!!!!!!). A kitty cat decided she lives with us.  Neighbors got this ADORABLE giant puppy named Jake - I think he's a Great Dane. Plus lots of other great things.

So, my absence isn't for lack of crafting or activity-ing, but it is for lack of time to activity and then blog about it.

I'm lumping two projects together in this post: a necklace for Brenda, and an apron for Eriko.  Brenda is a staff member at Concord who helps keep the Fine Arts Bldg looking fly, and after she commented on a necklace I gave to Karen, our secretary, I decided I should surprise her with one!

It was nice to sit down last Saturday and just play with beads for a little while. The new kitty likes beads...so that was an adventure...but I did get this project finished.


It's based on the cover design of the book Beaded Allure, by Kelly Wiese.  She has a second book called Beaded Romance, but I haven't purchased it.

Here's the cover of the book:
I kept the 5 circles on top but omitted the others, as they seemed fussy to me. And, I secured down the dangly things in each circle.
I drafted a pair of earrings based on the circle motif.


Picots around the back, with a big, bright bead as a clasp.


The proportion with the body is flattering, I think.

The other project I recently completed is an apron for Eriko.  Eriko and Pius got married August 8th (I shall forever remember because that's MY anniversary, too) and husband and I were two of the lucky few with them.  I got into the habit a little while ago of making dear friends aprons for no reason. However! It has worked out that nearly everyone I have given an apron to has either gotten married or engaged in the last year...sooooooo take THAT e-Harmony. 

Anyway, Pius and Eriko have known Casey longer than I have, but they made me feel so welcome during their wedding festivities. It was never "just" Casey for a photo or something - it was always both of us. That's a small thing, but it really made me feel like I belonged there with them and wasn't a recipient of a courtesy invitation only.

So! Though Pius and Eriko are already married, I will continue my tradition by gifting her an apron.  There's not much to say about it, as making one of these is a nice and easy project. I used cottons from my stash, and one is left over from making my own apron, so now Eriko and I are connected by cotton. Let's make that a thing, internet.

No pictures of the apron because I want Eriko to be surprised when she gets it. I will, however, provide you with a photo of my sewing helper as she sits atop her royal tower of pattern storage.

Leeloo Multipass Cangelosi Cat

She and I have already laid ground rules on when she is and isn't allowed in the sewing room. Pattern cutting?- nope. Fabric cutting?- nope. General sewing - sure.

I cut fabric for a performance top yesterday. Aiming to finish it by my recital on the 9th. Oh, speaking of!!