Showing posts with label marimba. Show all posts

Wednesday, February 24, 2016

Made! - Marimba Spiritual tunic

What's a Marimba Spiritual, you may ask? I'll tell you.

It's a piece of music by Minoru Miki that I had the privilege of performing Monday night at James Madison University.  Scored for a marimba soloist (me!!) with percussion trio, the piece is one of the staples of percussion repertoire.  Though I've performed portions of this piece before, this will be the first time I'll play the entire thing. It's very exciting!!

8am photos...
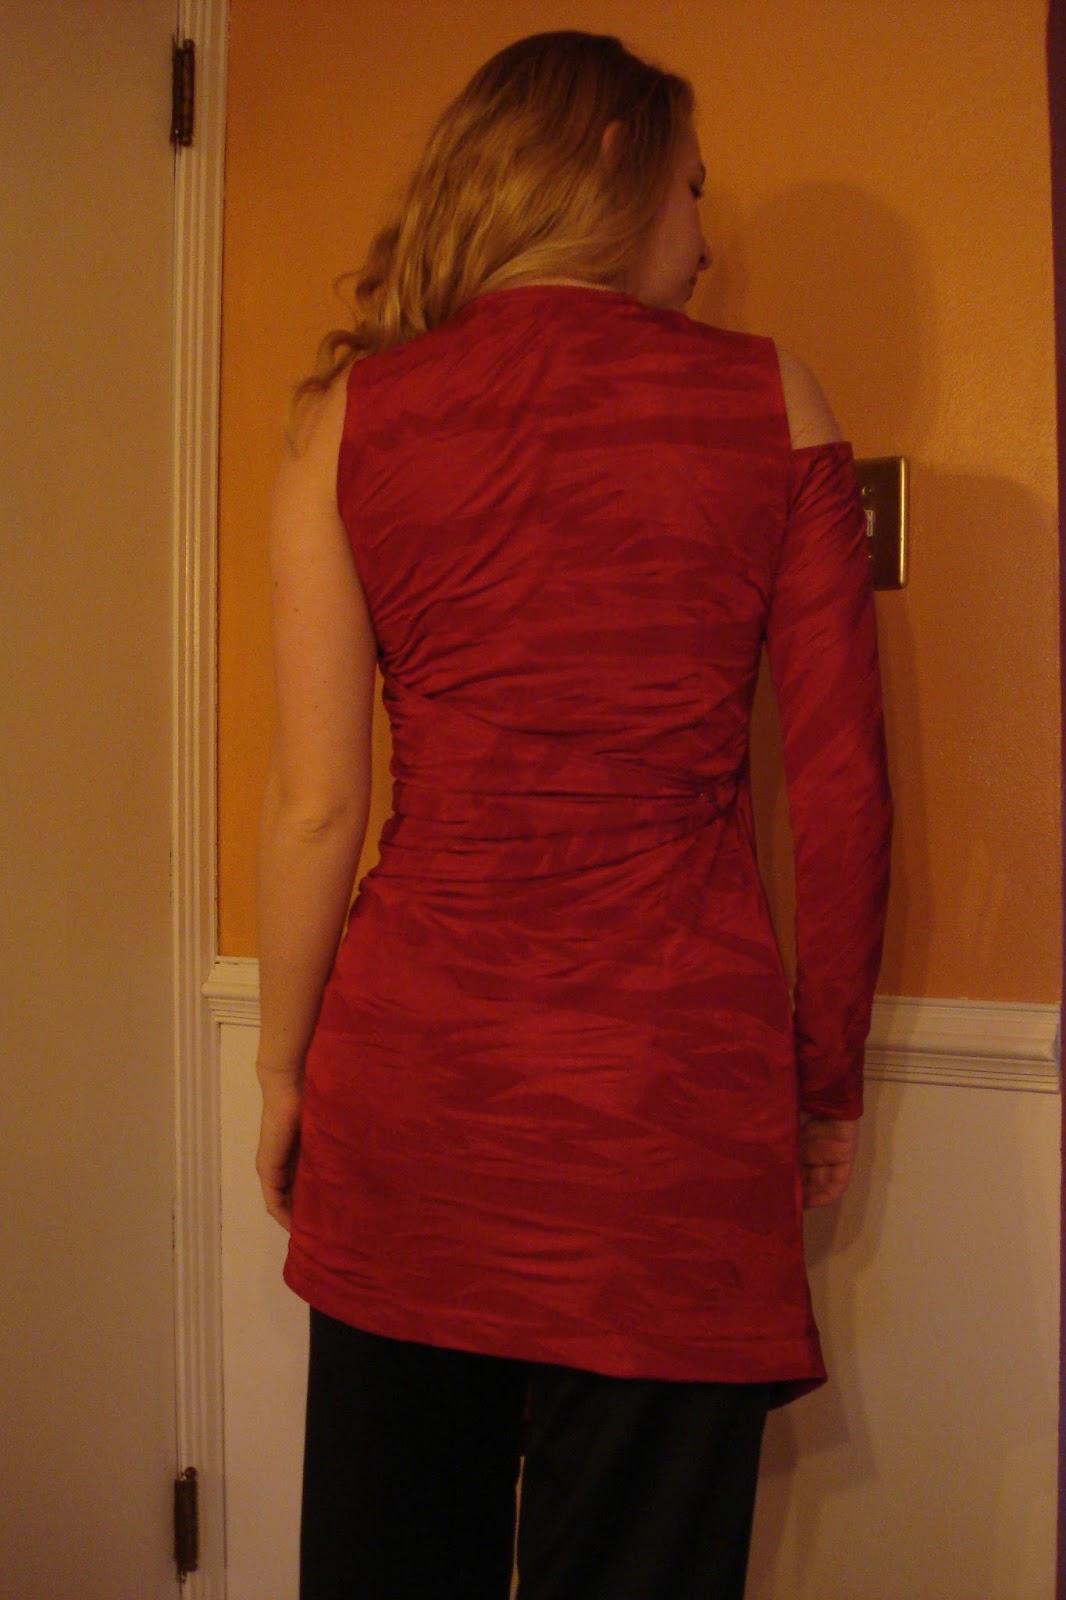
The back hem is supposed to be angled, which I rather like, actually.

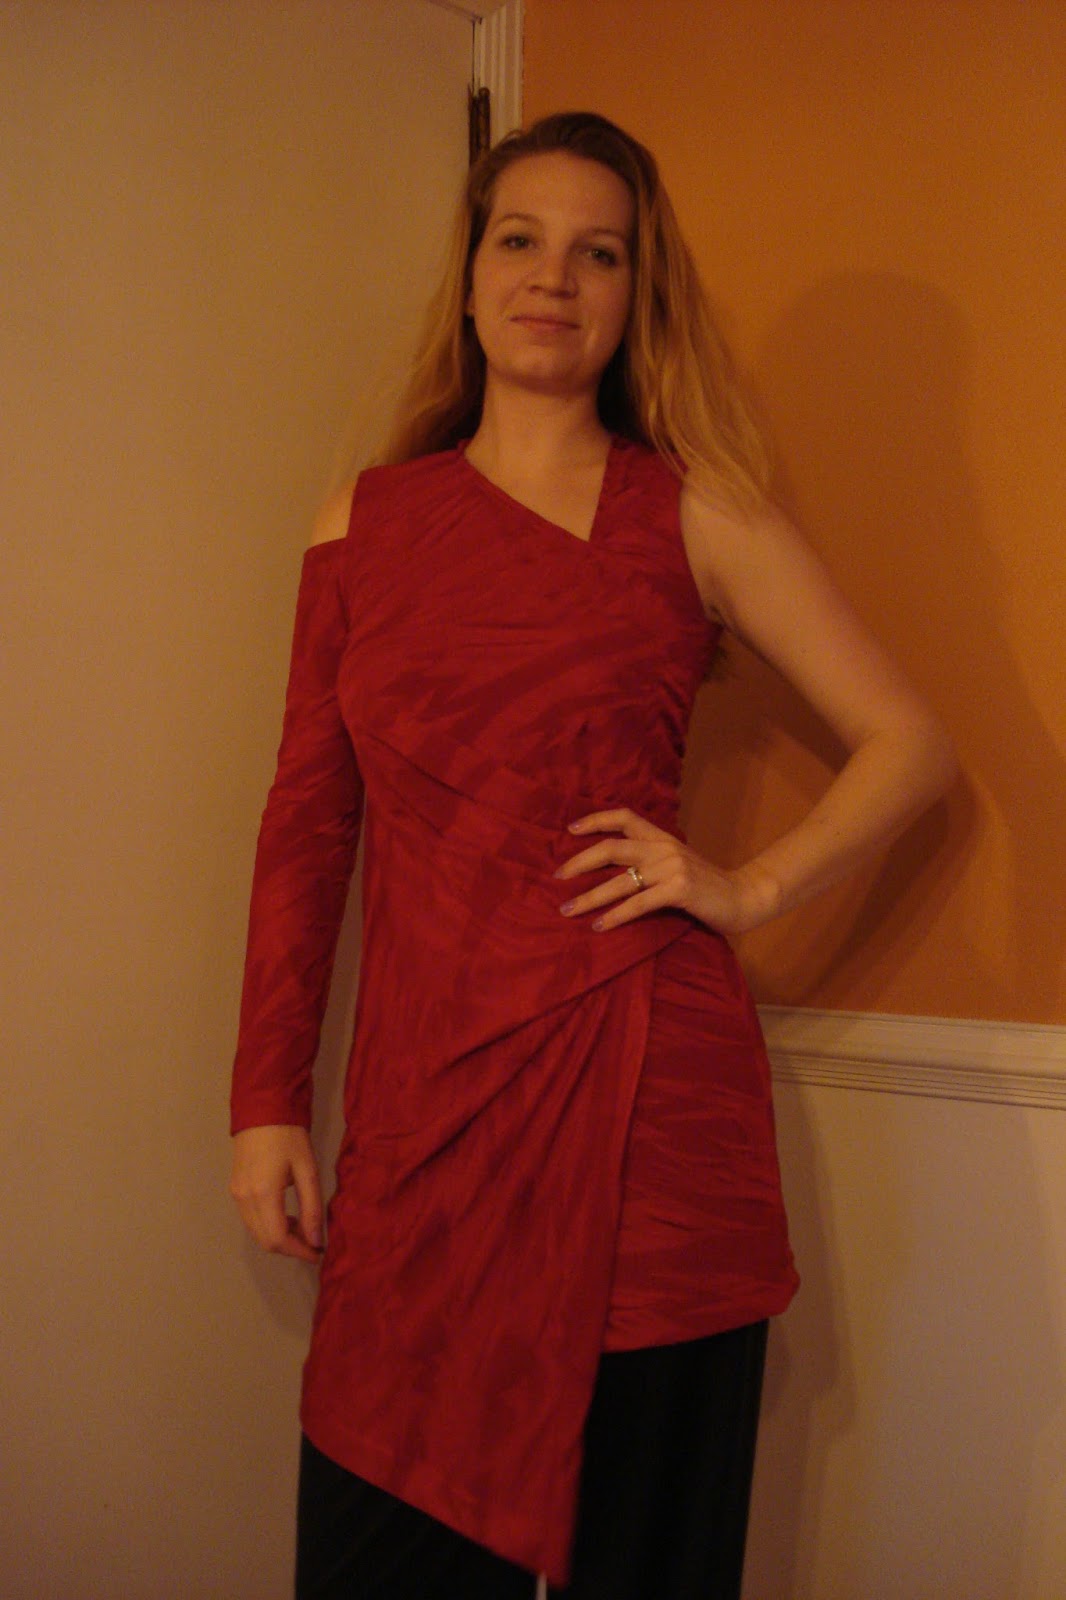
As a musician and a maker, what else is there to do while prepping for a concert than making an outfit for said concert?  This tunic is my second version of Vogue 2064, an OOP Donna Karan pattern.


I've previously made View B with no changes, but this time I added overall length and combined it with View A. Though I love the one-shoulder design, I don't enjoy the anxiety (however faint) that comes along with it.  At concert time, though I trust my own sewing, I'd rather not worry about it flashing some side boob.  Phrases, dynamics, and musical images I'll worry about.  But wardrobe malfunctions?...I'll leave those to the pop stars of the world.  Side note: Do you think I'll get more random Google hits on the blog since I used the word "side boob"??

Close-up. The right front wraps over the left.

For my version, I used the left front of View A, folding under and stitching the armhole allowance rather than attaching a sleeve.  I enjoy the right sleeve in View B: it doesn't get in the way or pull on the bodice, since it's only connected at the lower armscye.  This means big reaches across the marimba, like I have to do in Marimba Spiritual, aren't at all inhibited by clothing.

Here's an example of my first Vogue 2604 in action.

I love this shot! (Sidenote: This was back when I was lifting weights and running often - gotta get back to it!!)

The only tedious part of construction is adding almost 5 feet of thin elastic to the top edge. The instructions say to make a channel and then insert it through, but I found that the material wouldn't stop gathering as I did that, so I had to rip it out and just eye-ball it in place, gently pulling to stretch the fabric while I sewed the channel with the elastic already in it. I'll make sure to do this next time without trying the other method first.

This fabric is nothing sentimental. I think I bought it during one of JoAnn's Red Tag Clearance sales, so I paid maybe $8 for all of it.  I used a ball point needle on my machine for this, though it would be just as easy to use a serger.

Since this is a performance top and I knew I'd move around a lot, rather than using a hook and eye, as the pattern suggests, I attached the drape around the back with a safety pin or two. This way I knew it wouldn't go anywhere, and nobody sees it anyway.

I wore this top with  my concert pants, which I made a few years ago from View C.  You can see them in the photos. They are made of a thick, shiny ponte, which makes them look fancy from the audience, but nobody knows that they are perhaps more comfortable than my yoga pants! :)

Here are the side views.

Left side

Right side

The concert on Monday was great! I was overall happy with the performance, and proud of the work the students did for all the rep, not just Marimba Spiritual.  I'll be making a video (*hopefully*) if I got some good audio and visual.  I'll also try to get some stills of this tunic in action!!

Yay, marimba and sewing coming together!!

Saturday, June 13, 2015

Made! - Vogue 1340, version 2

Here is my second version of Vogue 1340, a Pamella Roland design that I love for its detail and simplicity.

Not sure when my legs developed such a turn out, but umm... there it is.

Though this is the second time I've made this pattern, it still baffles me a little bit in terms of fit. I remember having to take in quite a bit last time, so this time I cut a smaller size, but I guess I didn't grade correctly through the entire pattern. A size 10 bust should fit, but it would have been much too tight were it not for the architectural pleat at the top of the right bodice.

Here's a clearer picture of it, and a better view of the delicate floral design of the fabric.


Drag lines from the bust to waist tell me that I need more room, but I'll fix that next time around, cause I didn't have the patience to deal with it this time around.
I like how crisply this cotton presses into pleats, rather then becoming a soppy mess of fabric, like my first version.

Just for posterity, here's a photo of version 1.

It's a completely different color palette, but still floral. I guess I subconsciously think this pattern fits floral designs.  I can't help but notice I was also visiting the gym more frequently at the time of version 1. Photos don't lie. (Sadly.)

I lined version 2 in budget-friendly grey lining fabric, which turns out to be complementary to the small grey embroidered dots on the fashion fabric.  I think I bought maybe 5 yards of this grey stuff on super clearance, and haven't regretted it for a moment.


In case you were wondering, it is really difficult to put a fitted garment over a dress form with the lining on the outside.  Like, almost impossible to accomplish. I think the inside of this dress is beautiful. The slight curve to the bottom of the neckline facing is really flattering...I've wondered about colorblocking the front of the dress in this manner...we'll see! I can't imagine making version 3 anytime soon, but only time will tell.
I also said I'd never get a cat, and look at how that turned out.

SUPERLOO

I sewed a label to the back lining before attaching the lining and bodice together at the waistline seam. Thankful I was gifted an assortment of colors, as I was able to find a nice grey and white label for the inside of this dress.


If you can see the zipper at the ridge edge of the photo, you'll notice it's purple. But it's not just any purple...it's "Laurel" purple. Don't believe me???


Overall the fit of this dress doesn't have as much ease as it needs, but I found it difficult to guess how much I could have and still maintain the fitted look that I think this sort of silhouette needs. The bodice is probably closer to my exact measurements than it should be, but I find comfort in knowing that I can zip the thing without worrying it will rip open. It isn't that tight. ;)  (But still, gotta get back to the gym!)

Side view, showing the pulls that broadcast my grading mistakes to the entire world. {le sigh}


This is dress is beautiful from the side though, something not all designs have in common.


I would probably wear this dress with heels, dried hair, and jewelry...but these photos came right after a run and a shower, so flip flops and wet hair is what you get, hahahahahaha

I'm contemplating on wearing this dress next week during the marimba competition on the one day I know I won't be performing. Even if I don't wear this, I'll wear something I've made, as it makes me feel confident. And you need that at a competition! 


Wish me luck!! <3

Thursday, October 16, 2014

Made! - Concert Attire

Confession: the top mentioned in this post was finished a month ago.  Writing about sewing always takes a back seat to actual sewing when I get busy.

Both of these makes are for when I perform in concert. The first garment, a v-neck tunic, was made for the marimba competition in Italy last month.


Marimba Top

I used Simplicity 1325, View D, and pretty much made a size 10 with my standard adjustments: take length out of the upper back (ehhem because I stand up straight), lengthen the torso between the bust and waist, and add some extra length at the hem for good measure.


I've recently started cutting size 10 in the Big 4 instead of a 12, in the bodice anyways. This happened as an accident, honestly.  Maybe the yoga is narrowing my upper half (note to self: focus yoga on BOTTOM HALF), or maybe it's the practicing.  Or maybe it's the nervousness creeping up and making me forget to eat. Either way, I just like making clothes that fit, whatever size they may be.

Pretty lapped zipper down the center back

I saw this fabric and had to have it. It has all of my colors in it, from the dark red to the bright turquoise hidden amongst the animal print. Yeah...it's animal print! Zebra and leopard, I think. I like how it's disguised in the overall design.  The lining is the same navy polka-dot fabric I used to line my dark floral architectural dress.

Sorry...upside down


I really like this pattern.  Usually low necklines have a gaping problem, but this one isn't as bad as others. I can wear a black camisole or strapless top underneath, both of which are comfortable performance attire.  I like the subtle shaping at the shoulders, and how the neckline hugs the neck without getting too close.


I did make half of a muslin to test the fit of the top, and am glad I did because I figured out I should cut a size 10 instead of 12!  I don't buy special muslin fabric. I instead use scraps from leftover projects. For example, the muslin fabric for this top was leftover from the TN Cotton Blossom dress I made for my sister (original post here).


You can see the fold where I took some length out of the upper back.
Should have also messed with that dart a little bit. 

This top was specifically for Round 1 of the competition.  I wanted something new that fit the music but made me feel confident because I MADE IT.  For some reason I always feel like I'm "putting on" when I wear fancy clothes made by other people when I perform.  But when I make it, it's like I'm just owning another part of the performance, and it's comforting rather than high maintenance.

The top brought me luck, as I played well enough to make it through the first round of the competition!! :)


Evening Skirt

In today's performance climate it is still customary to wear all black, though a pop of color is acceptable (see above!!), especially if the performance is a solo concert.  As the vast majority of my performances have been as a percussionist, I have always had to wear pants to facilitate the movements necessary to play the instruments.  I've long since envied those that can wear a pretty dress and not be hindered by it, or worry that when they reach for the low C that the strapless top will suddenly fail.

I've grown weary of wearing pants when I perform. I knew long ago that I needed a change.  Unfortunately, a floor length black evening skirt can cost a pretty penny. Fortunately, I am obsessed with sewing. 

Using Simplicity 5006, I made this skirt of AWESOMENESS as soon as husband and I returned from Italy.  

 
The back.  Three large hook-and-eyes on the waistband.  The material doesn't look so wrinkled in real life.  It lays flat effortlessly against my back.
 
 
Yes, technically, this is a lingerie pattern, but I don't think it has to be.  I chose View B, and simply omitted the petticoat/underskirt. I was left with the long skirt and extra-wide waistband with boning, including stretchy bits on the sides.  At first I contemplated redrafting the waistband to eliminate the stretchy parts, but then I realized they probably make the skirt much more comfortable and would be my best friend at all those post-concert dinners.  Ha! 


Stretchy bit is between my fingers.
 
After finishing some high-waisted marimba pants last winter, I had a small square of high-quality black knit left.  Good thing I didn't throw it out! It was the perfect weight to function as part of the waistband of this skirt. (Don't you love it when sewing stash hoarding works out??? Makes ya feel a little less guilty about the whole thing...) :)

Interior of the skirt: you can see the thick knit and the boning on either side of it.  Since I didn't line the skirt I just finished all the inside edges with double stitching and a zig zag. NO FRAYING. arg.
 
The side seams are finished as flat-fell seams.  Since I ended up taking a LARGE seam at the center back where the zipper is, I had enough material to wrap around the raw edges of the zipper tape, which not only looks really nice but also meant I won't have those annoying zipper scratches that can result from an unlined garment.  Huzzah!

Beautiful, non-scratchy zipper.

 
Speaking of lining, I contemplated lining this beauty.  I decided not to, considering the heat from stage lights and the fact that I have to move often on stage.  Lining would just get in the way and I would worry about tripping on it, not to mention I'd essentially be making the skirt twice and something about that just bothers me. I'll get over it one day, I'm sure.

The material used is a black polyester/mystery taffeta fabric I bought on super-duper clearance at JoAnn's.  There aren't locally owned apparel fabric stores near me, so JoAnn's or Walmart it is.  This stuff was $3/yd.  It has a sheen to it that would annoy me under normal circumstances but is actually perfect for stage lighting, as it makes the skirt look really expensive. 

Ah, yes. A RTW skirt could have cost me $80-$100, if not more. 
Laurel's skirt:
     fabric - $6 + stash busting
     zipper - $2?
     hooks & eyes - $1?
     joyful hours of sewing - Priceless

I'm looking forward to wearing this skirt in two concerts later this month: one at The University of Tennessee, the other at Concord University. 


Sunday, August 31, 2014

Presents for Nice People

Much has happened since my last post.

I finished a dress I've yet to tell you about. Classes have started at the university.  My parents bought us a washer and dryer (!!!!!!!!!!!!!!!!!!!!!!!!!!!!!!!!!!!). A kitty cat decided she lives with us.  Neighbors got this ADORABLE giant puppy named Jake - I think he's a Great Dane. Plus lots of other great things.

So, my absence isn't for lack of crafting or activity-ing, but it is for lack of time to activity and then blog about it.

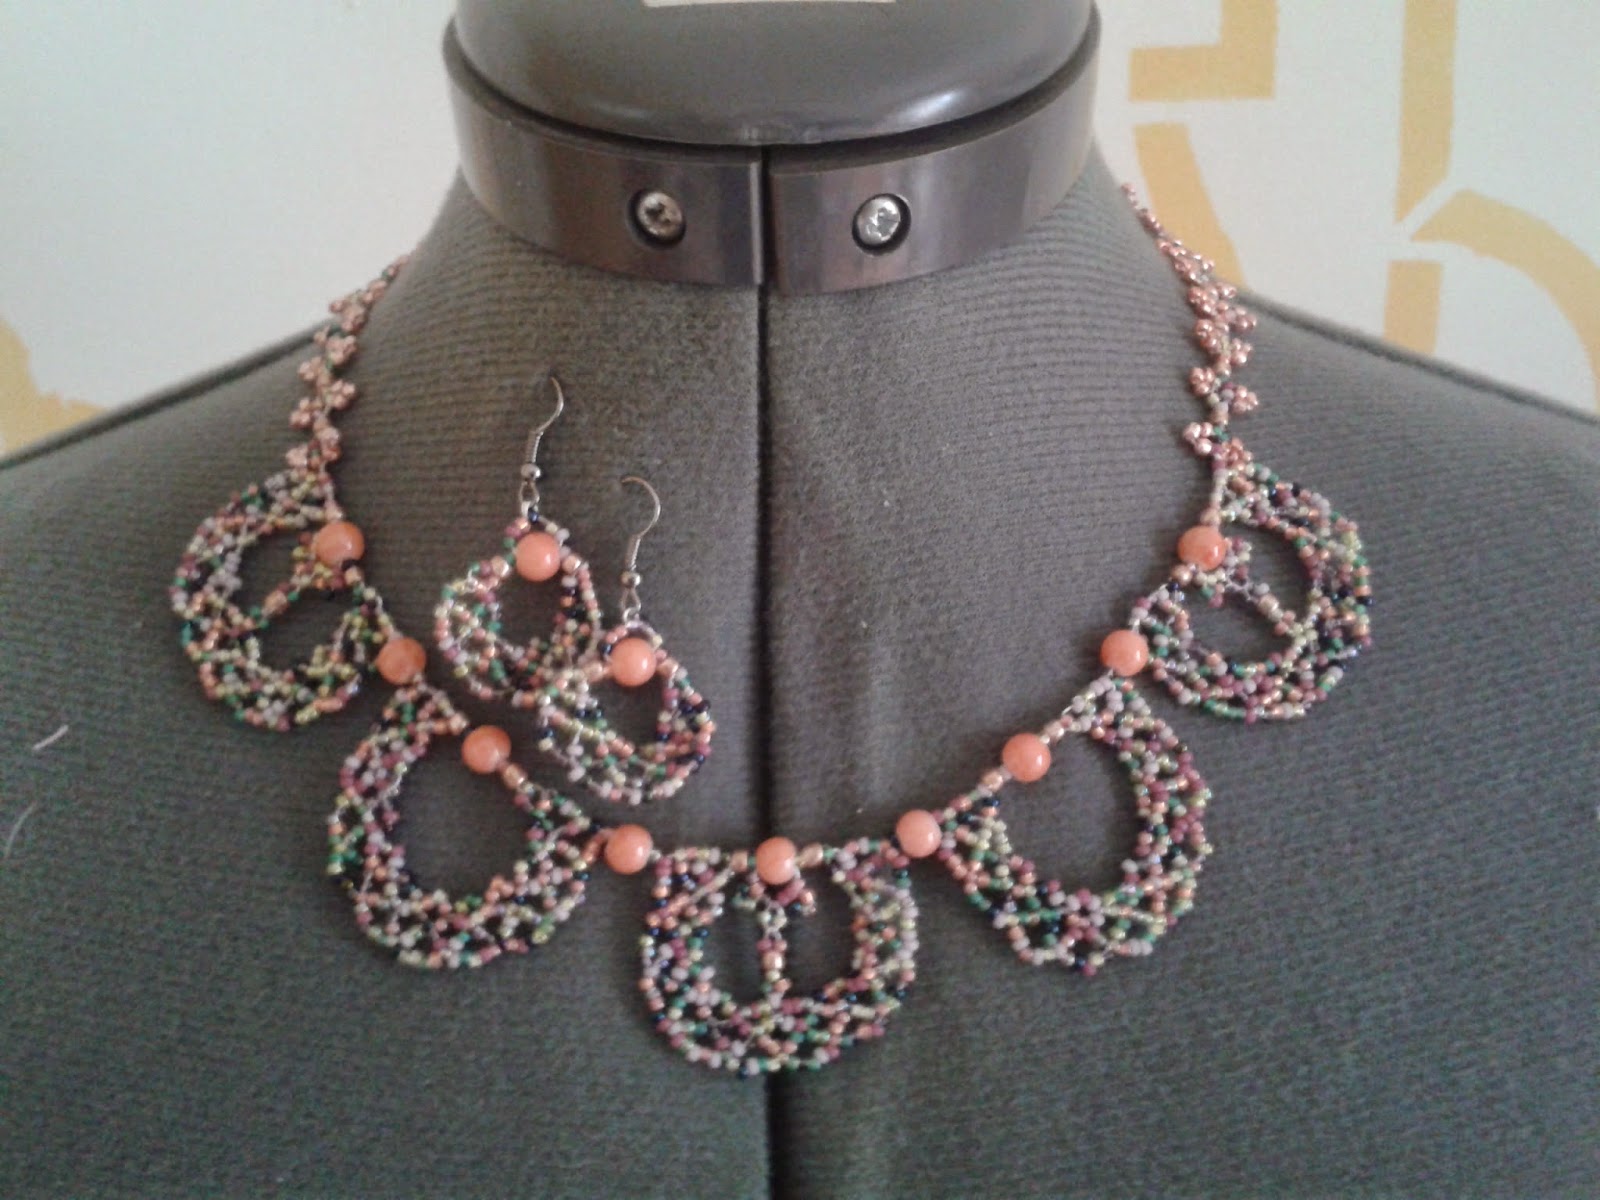
I'm lumping two projects together in this post: a necklace for Brenda, and an apron for Eriko.  Brenda is a staff member at Concord who helps keep the Fine Arts Bldg looking fly, and after she commented on a necklace I gave to Karen, our secretary, I decided I should surprise her with one!

It was nice to sit down last Saturday and just play with beads for a little while. The new kitty likes beads...so that was an adventure...but I did get this project finished.


It's based on the cover design of the book Beaded Allure, by Kelly Wiese.  She has a second book called Beaded Romance, but I haven't purchased it.

Here's the cover of the book:
I kept the 5 circles on top but omitted the others, as they seemed fussy to me. And, I secured down the dangly things in each circle.
I drafted a pair of earrings based on the circle motif.


Picots around the back, with a big, bright bead as a clasp.


The proportion with the body is flattering, I think.

The other project I recently completed is an apron for Eriko.  Eriko and Pius got married August 8th (I shall forever remember because that's MY anniversary, too) and husband and I were two of the lucky few with them.  I got into the habit a little while ago of making dear friends aprons for no reason. However! It has worked out that nearly everyone I have given an apron to has either gotten married or engaged in the last year...sooooooo take THAT e-Harmony. 

Anyway, Pius and Eriko have known Casey longer than I have, but they made me feel so welcome during their wedding festivities. It was never "just" Casey for a photo or something - it was always both of us. That's a small thing, but it really made me feel like I belonged there with them and wasn't a recipient of a courtesy invitation only.

So! Though Pius and Eriko are already married, I will continue my tradition by gifting her an apron.  There's not much to say about it, as making one of these is a nice and easy project. I used cottons from my stash, and one is left over from making my own apron, so now Eriko and I are connected by cotton. Let's make that a thing, internet.

No pictures of the apron because I want Eriko to be surprised when she gets it. I will, however, provide you with a photo of my sewing helper as she sits atop her royal tower of pattern storage.

Leeloo Multipass Cangelosi Cat

She and I have already laid ground rules on when she is and isn't allowed in the sewing room. Pattern cutting?- nope. Fabric cutting?- nope. General sewing - sure.

I cut fabric for a performance top yesterday. Aiming to finish it by my recital on the 9th. Oh, speaking of!!


Saturday, February 8, 2014

Musical Arts and Crafts

I love playing marimba. What I happen to love just as much (...besides sewing and writing...and playing the piano) is mounting a score into my pretty little book. What do I mean by this?? Let me show you.

When a piece is 14 pages long, it takes up this much space:


SO MANY PAGES.

And in case you were wondering, I have two Shakespeare quotes on my office wall:

"Thought is free."

"Say as you think and speak it from your soul."

The center quote says, "In order to live a creative life we must lose our fear of being wrong." - Joseph Chilton Pearce


I have always made my own little posters of my favorite quotes, but as that's not what this post is about I shall move on. 

So, turning 14 pages is not an option in performance, especially when my hands are tied up holding mallets. And, since nobody wants to be the person with 6 stands in front of them to make a row of music 9 feet wide, seriously, never be that person it just makes you look pretentious and stupid, we come to the solution of "my pretty little book." The first person I saw do this was Nancy Zeltsman, but I must say that my buddy Matt Sharrock makes his scores into works of art. Perhaps it's all that time working in a library. He's so crafty. Intellectually crafty.

Anyway, here's my book.  Ooh....aaah....

 Here's the inside of my book.  Ooh...aaah....

Essentially, I take a score and figure out the few places I can turn pages. Knowing those places, I mount/tape/glue the pages onto the larger sheets of paper, with those page-turnable spots at the ends of the large sheets. I use a mixed media sketch book because the pages are nice and thick, so adding weight to them is no problem. 

Occasionally, it works out to where you can mount one page at a time. It's very aesthetically pleasing.


Like this one. Pretty page. No craziness here.


But other times, things get to looking kind of crazy. 

I LOVE putting my scores into my book. It makes me feel like I'm taking care of the music...or something like that. I don't have children, so I suppose I don't truly understand the concept of "nesting," but I bet it is creepily close to the feeling I get when I mount a score. I have to get to know it, figure out its quirks and problems, and make a tidy little home for it in my pretty blue book. 

Go ahead. Judge me. Some of us are supposed to be normal; others of us aren't. I have accepted my fate.


Once I finish taping the pages, the large sheets look like this:


When there need to be page turn tabs, I make those out of scraps of the heavy mixed media paper. I'm holding one in the next photo. (You may or may not be able to tell, but this piece has 5 page turns, so there are levels of tabs. I number them, too, that way I don't accidentally flip to the end of the score. Or worse yet, flip to a different piece in my book!)

I then insert the pages into the spiral of my book, and then voila! Gorgeous sketch book full of music.

I only need one stand to set up 4 pages of music. Awesome.
I love it when music-making incorporates arts and crafts. That's the best.

Lovelovelove

PS - The charming little scores we've been looking at are for the upcoming Balletik Duo concert! Stay tuned.