Showing posts with label meaning. Show all posts

Sunday, April 30, 2017

Made! - Vintage (1973) Simplicity 5914

Finished a few weeks ago, I present my most recent project!

I'm well-pleased with how this dress turned out! I was able to practice a number of techniques, from handstitching to French seams on the armscye.  

The pattern was gifted to me by my first grade teacher, Mrs. Worth. We have reconnected via Facebook and a love of sewing, and she surprised me by dropping off a bag of patterns that she no longer uses.  This one is a 1973 release: Simplicity 5914. 

I made View 2, shown in blue
I was intrigued that the size printed was a 12.5...and guess what? It fit perfectly! I only made a few alterations, like a long torso, erect back, and armhole adjustments, but I always do those things. The sleeve width, bust, waist, and hip all fit without effort. Yay!

It's cool that they used to print pattern pieces on the envelope back. They don't do that anymore, probably because they made the line drawings much larger, or because they now print directions in French on the back as well. 


The fit through the back is one of my best: clearly fitted, but enough ease to really move without worry. I played piano and marimba in this for a few hours with no pulling at the arm or center back. I'm rather proud of the centered zip - typically, I avoid these, but decided to give it another go, mostly because there wasn't a good way to make it lapped, due to the collar at the top, or move it to the side, due to the sleeves. 


The center front seam has serged allowances and is handstitched at the point. The sleeve cuffs are whipstitched so they won't get floppy and fiddly in the wash.


I did my usual collar trick of removing 1/16" from the underside so the edges rolled nicely. These lapels turned out great! The topstitching was a great test of patience and focus, as I used really small stitches and didn't want to rip any out to start over!

Lastly, here's a different angle to see the color of the fabric more accurately.

On second thought, maybe next time I'll remove a bit of width from the bodice fronts, but for the moment I'm satisfied. I wore it to work with leggings underneath (casual Fridays, mmhmm), but need to purchase a slip for warmer weather. The fabric is probably a little too thin for this design, but I really wanted to use it anyway. It was purchased from my local store, as was the zipper. Yay, supporting local business!

I've got a maxi dress in the works for New Music Gathering, a conference of sorts that I'll be attending and performing at next month.  It's almost done, and I can't wait to share it!! :)

Friday, October 7, 2016

Made! - Vintage Simplicity 9332

It's probably safe to say that most folks don't interact much with their first grade teacher once they leave elementary school.  But we all know how social media has changed the ways we connect with one another, allowing us to keep too many tabs on others' life events, not to mention render the classic high school reunion all but useless.

But sometimes it's delightfully surprising what happens, like when my first grade teacher, Mrs. Worth, and I became friends on Facebook.  Truth be told, she has always reminded me of my mom, probably because they look alike.  I found out that she, too, enjoys sewing, and had many a pattern that needed a new home.

I am that home!


She was nice enough to drop them off with my parents, who delivered them to me on a recent visit.  There was a whole mix of styles in the box, many from the 70's, which - if you recall a different pattern collection gift from family - nicely compliment my collection from the 50's and 60's.  My aunt often mails patterns, too, which are usually 80's and 90's. So...costume designers, hit me up. Ha!

Anyway, one of the cute and practical patterns was for something called a scooter skirt.  It's basically a skort (skirt with shorts underneath).  An added detail is a tab with D-ring closure.  The pattern is drafted for a 24 inch waist, which I haven't had since middle school and needed to adjust to fit my current size. ;)

I used a pretty purple zipper because sometimes you have to rebel against matchy-matchy.


The fabric is a stretchy gray denim that I originally planned for another pair of Ginger shorts.  In hindsight, it's a bit too stretchy for this pattern, but it does make this make incredibly comfortable, even on a 10-hour drive! Ask me how I know...


I wore this out to a concert the day I finished it, and it was very comfortable! Husband and I went out for a drink afterwards, and rather than having to wiggle into a hightop chair in a short skirt I could just step right on up there, no worries! Yay, shorts! I must admit, as someone who moves a lot and isn't always the poster-child for graceful etiquette, these are good for me.

Rather than use D-rings for the tab I just tacked it down with a button that I've had for years. I love it!

See that LooCat tail in the background? She likes to help Momma sew...

I also tacked down the facing to the darts and seam allowances, making the inside very clean.

Thanks, Mrs. Worth, for sharing your patterns with me!

Sunday, July 24, 2016

Made! - McCalls 6952

McCalls 6952, labeled as an Easy pattern, was just that.  It's a princess seamed, sleeveless dress in different lengths. I decided mine should be a maxi, and reach the floor when wearing flats.


The fabric was purchased a few years ago on a trip to Mexico, and I looooooooove it.  I was drawn to each color in the stripes, but particularly how they are laid out together.  The dress is cut on the crossgrain so the stripes are running vertically, and I had to let go of stripe matching, and aimed instead for straight grainlines.


I used some organza as the neck and armhole facings, though if I make this again I will use bias strips instead. The facings are thin and therefore don't show through, but I don't like having to think about it.


I ran each seam through the serger after basting the dress together for fit.  Upon looking at the measurements I would up cutting a size 10 with a size 10/12 at the bust.  In the future I may go to a full size 12 in the torso, as I would like just a tad more breathing room.

a blurry but truer representation of thecolors :)
I wore this dress to two weddings in Boston earlier this month, and received compliments from both guys and gals, so I think it's a successful garment!  You can be sure I'll take this on vacation later this summer!


It has the LooCat seal of approval!


Wednesday, July 20, 2016

Made! - Self-drafted tulle skirt and Nettie bodysuit

Ya'll, it's been a year of weddings.  Husband and I have already attended 4, so naturally I had to make a new outfit for each.


Through the last few years of sewing I've figured out what silhouettes I like, what my style is.  But then there are moments like a few months ago when I decided that I needed to make a tulle skirt. Why? No idea. I spend my days in yoga pants, comfy dresses, and easy skirts - tulle is a little high maintenance. Add to it the fact that the tulle is mostly pink and it's like I don't know who I am anymore.

The inspiration came from the trim I used as the waistband.  It's a heavy linen with a beautiful embroidered design.  I decided that it should be the focus of the skirt.  The color of the tulle and bodysuit both come from the embroidery.


Layers (16!) of medium pink and apricot tulle are layered to achieve the color I wanted.  A quick gathered rectangle served as a lining.  Though I used the machine to attach the tulle to the waistband, the center back seam is sewn by hand with invisible thread.  Very time-consuming. Closure is achieved by snaps in the lining and buttons on the waistband.


Speaking of - check out those buttons! I've had them for years, waiting for the right project.


The Nettie bodysuit is made of some cashmere knit I found on sale at my local fabric shop. It is unbelievably soft and comfortable.  I learned that I need to shorten the armscye on this pattern considerably, as there was originally so much fabric that it bunched in a way that I couldn't just leave. So, after some creative pleating, I would up with this design, which not only shortens the armscye, but provides some interest and fits the style of the outfit.


Other changes I made to the pattern:
- lower the back neckline
- lengthen the sleeves by an inch

I think I'll make another post showing how I made the tulle skirt without a pattern, should anybody be interested! Part of me wants to make another one in black - what an interesting juxtaposition of a feminine fabric in a strong color!


Tuesday, January 19, 2016

The Family Gathering Dress

It's been a long time coming, ya'll...


I'm rather excited to share photos of the Family Gathering Dress, which I finished in May of 2015. Life got in the way right after that, between competitions, moving, new jobs, a new (to us) house, and traveling.

Back view

I draped the pattern myself, and am almost happy with it.  Not going to go about listing the parts I don't like - instead, I'll point out the parts that I do!  One lovable thing: the well-fitting curve of the shoulder band!

As written before, the print placement took a long time to figure out.  It takes up the entire 60 inches of width, which makes it glorious for a maxi dress such as this.  There was no print matching, only matching of basic areas of the design, such as the dark blue curves all being in roughly the same place.

Photo attempt before enlisting husband's help!


Close-up of the waistband
The print design at the side seams came out beautifully. I almost love them more than the front and back!

Left side seam

Right side seam - with slit for walking!

The most special part of this dress is the beaded left shoulder.  Certain areas are highlighted with red, gold, turquoise, white, silver, or bronze beads.  I used clear thread to attach them, and I can't tell you how long it took to sew them on. A long time!

It's difficult to get a good photo of them on a winter evening..


You can also see the earrings I designed to match the dress. :)

Beads are concentrated at the left shoulder and gradually lessen towards the center front and back.  The last beaded area is in line with my chin, which is hopefully observable now that I've pointed it out.  The circle burst where the bodice meets the band is adorned with Swarovski crystals.

The photo below (from a previous post) shows a clearer picture of the vivid colors of this material.


And here's a close-up of the earring design.


The dress is fully lined, with lots of slipstitching to secure raw edges on the inside of the garment.  The invisible zip is light blue and on the left side of the bodice.


Luckily, I have a good length of the print leftover.  It was purchased in Mexico, so there wouldn't be any quick trips to buy more.  I'll have to think hard on what to make with it next. :)

If you'd like to follow the long progress of the making of this dress, you can check out my previous posts:
-  Designing and Cutting
-  Bodice Assembly
-  Beading and a Sneak Peek

I made this dress for the Family Gathering, which is the time when mine and husband's families officially met.  Our only regret about eloping is that our families weren't there with us.  But! Setting aside a weekend in all of our schedules that was about nothing but spending time together meant that everyone got to know something special about their new extended family rather than hurrying from ceremony to reception to hotel to airport.  We're really happy that everyone was able to make the trip.

Saturday, August 8, 2015

The True Cost of the $5 T-Shirt

When I really started dabbling with sewing about 6 years ago it was because I was tired of RTW dresses not fitting properly.

Since that time my attitudes towards RTW clothing have changed considerably.  At first I only sewed dresses for "events," even if it was just my mom's birthday dinner.  Then I realized that I could make clothes instead of buying them - tops, skirts, etc.

After that, I noticed that my shopping habits were rather non-existent.  It wasn't remotely interesting to go to the mall and look through clothes racks, no matter the store.  All I did was inspect darts and seams, judging the quality of those items.  I couldn't bring myself to entertain looking at knit tops at Old Navy because they were "poorly made."

It's not with a sense of pride that I admit my distaste of RTW.  After watching the documentary The True Cost on Netflix recently I'm ashamed that I ever supported fast-fashion chains at all. I'm looking at you, H&M, Forever 21, GAP, Old Navy and Zara, among others.

The True Cost

If you want to see the actual conditions these clothes are made in, watch this film immediately.  We're told that these big garment companies take jobs to these under-developed countries, and while that may be true, a job that borders on slave labor due to a lack of regulation is not a gift.  A [slave labor] job provided only if that country can produce a $5 t-shirt for 8 cents is not a gift.  The "poor quality" I saw in Old Navy's garments was a direct reflection of the quality of life of the person who made it.

The film of course focuses on the cost to people, to humans, just like you and me.  It also talks about the agricultural impact of treating land like an inanimate object for service rather than the thing that sustains us with food, fuel, and nature.  It also mentions the garment industry disaster of Rana Plaza, among others, sadly.  Activists are featured for their hard work for fair trade industries, companies, and debates with the big companies.  Two of the most eloquently spoken interviewees are a Texan organic cotton farmer and a beautiful widow from an under-developed country.

Action for the Guilty

What do those of us do that supported (or continue to support) the fast fashion brands?  I feel more resolved to continue making my own clothes, except now it's not for fun but because I never want to support one of those companies again.  There's such a grave disrespect for the humanity of the workers, on the parts of the governments, the factory owners, the management, and of course, the brands demanding higher production at lower cost. 

There are those whose skills are best put to use in the political fight, those meant for the economic discussion, and then there are those who can quietly express discontent by no longer consuming what those brands have to offer. 

I wish I had the gumption to fight in a different way, but for now all I can do is continue to not shop at those stores. I will cut out my sporadic "aesthetic field trips," as I call them, that I take from time to time to just look at new things.  As one of the women interviewed said, "I don't want anyone to wear clothes made with our blood."

Heartbroken.

Still doesn't feel like enough, though

My meager financial protest doesn't mean much, especially on its own, especially when I still run to Target for other items, when I am forced to go to WalMart at midnight because it's the only thing open.  This feeling I have, the "how did it get so awful" feeling is the same one that lingered for weeks after watching documentaries about Monsanto and their patenting of seeds, or of the vile mistreatment of animals.  It hurts.  What have we allowed to happen?  More than that, how do we reverse it?

An economist, Richard Woolfe, speaks of reworking our system. Of course we're killing the earth, whose very design is limited sustainability, with an economy that runs on the infinite expansion of consumption of natural - and human - resources.  Of course this has happened.

It's incredibly difficult to see the global hardships - dying villages, chemically-caused genetic mutations, poor work conditions, [near] slave labor, and death - all because I enjoyed walking into the Forever 21 on Newbury Street from time to time to buy a long t-shirt dress for $15 because it is comfortable and versatile.  And yes, it is my fault that the poor conditions happened. Most likely, it's your fault, too.  We shopped there.  We, by our consumption of those garments, gave our approval of the practices. We can't do it anymore. 

The next step for me is to move towards only ethically sourced fabrics.  This is a really hard thing to do.  Not only are they hard to find, but they are rather expensive. Obviously.  In the mean time, I can support the fair trade stores and products near me, and halt my own consumption of cheaply produced fabrics.  

There's a book called Overdressed: the shockingly high cost of cheap fashion that I've been meaning to read for a few years now, even though I have a pretty good idea of what it says, especially after watching The True Cost.  There's a website devoted to the book here.

- - - 

Well, this post has been a bit out of the ordinary for the tone of this blog, hasn't it?  Still, it is imperative that this discussion, this awareness get to the forefront of all of our minds.  We all wear clothes. If we all start to purchase them consciously, perhaps this will be a first step towards ending the injustice and disrespect towards garment workers all over the world.

Love to them; love to you.  Let's make the world better, shall we?

Thursday, May 7, 2015

Family Gathering Dress - part 3

Much has been done since my last post about the FGD.

The skirt and waistband are attached.
Side invisible zip is inserted.
Inside linings are slip-stitched to the zipper and waistband seams.
The side slit edges are hand-sewn together for a clean and effortless line...with NO visible stitches!

Here's a sneak peek of the bodice, waistband, and skirt. I love the print placement!!


In my efforts to keep the finished product somewhat of a surprise, pictures from here on out are going to be stealthy and probably weird and low-quality. I would take dress form photos if my form had collapsible shoulders, but since it doesn't, once the zip was put in it was too small to slide on. So, awkward lap pictures it is!


BEADS.

What I've been doing slowly and in little spurts for days is adding beads.

Beads, beads, beads. Beads of all shapes, beads of all colors. The goal is to just bedazzle the entire left shoulder as much as possible.

Here's a progress shot without giving away too much. :)

The facing is the green fabric above. It and the allowance near my hand will be turned over and slipstitched on the underside.

I am so excited about this project. The red beads were the last ones I bought, mostly because I was anxious about being able to find the "right" red, if that makes sense. Often, red seed beads can look cheap if they aren't saturated enough with color. Around here it's difficult to find anything specialty in that regard.

Husband is so nice that when he ran errands the other day I asked him to buy some for me. Knowing I'm particular he sent me a photo of all the red beads for sale (admittedly only two kinds) so I could pick them out. So good, that husband!

I am excited that I already had most of the other beads I'm using left over from previous projects. Yay for recycling!!  And hooray for a cohesive color palette!

I even purchased some Swarovski crystals on sale to add some extra sparkle. The plan is to save some to make a complementary pair of earrings...if I have time. :)


My Process

Luckily, beading goes by pretty quickly. I like to cut one arms-length of invisible thread, thread a needle and double it, then knot both strands. This does make for a workable length of about 14 inches, and yes, you need much more thread than that for the whole project, but in the event that it breaks or snaps you don't want 643 beads flying everywhere when it could only be 113 beads.

(This logic is based on an advanced logarithm involving my own clumsiness, life's happy accidents, and random bad luck.) LOL

Loo is upset she isn't allowed in the sewing room right now. With little containers of beads on the table I can only imagine what would happen if she decided that she needed to sit up there, too. Oh, Loo. She sits outside the door and talks to me, sometimes gets a little whiny. Good thing spring is here - I let her outside and she's happy for hours!


The Unintentional Leave of Absence

I didn't mean to have a three week break between posts. In fact, I've been very busy with sewing projects! The truth is, though, I've just been really busy.  I'm not particularly proud of being a busy person, but that's how it goes this time of year.  We've had 7 concert in 9 days, plus juries, plus final exams, plus a house-hunting trip to our new city.  "Busy" barely covers it. 

Thankfully, with the presentation of those final concerts life is now much easier.  Now, rather than preparing 4 recitals, I can concentrate on the marimba competition in June! It never stops, I tell you.

If you want to know more about these performances, you can check out my music blog at laurelblackmusic.blogspot.

Tuesday, March 10, 2015

Progress Report: THE QUILT

Hi everybody.

I'm really glad I decided to work on this quilt in the background of other projects. Because you could spend your life making squares and subsequently, triangles. Six hours on Saturday I was at the sewing machine, and all I did was sew small squares together and make... larger squares.

COFFEE. Yes, please.


I mean, it was really fun to see how my fabrics looked together, and I felt accomplished at the end of the session, but somewhere around the 4-hour mark I grew a bit weary.

I completed 21 12"x12" blocks for the quilt construction.

Cat in the bottom corner. She was, you know, "helping"


PINOT NOIR. Yes, please.


I loooooooove the dark multi-color fabric! I wish I bought more of it :/
My colors are kind of all over the map, so to speak. Some are really dark, others are really light. I suppose that's my taste - if it's dark it's black and if it isn't it's probably white or light gray. At least I'm consistent?? Anyway, I'll either follow my original mix-and-match idea for block placement or I'll arrange them in an ombre effect from the top left corner to the bottom right. I'm kind of leaning towards the ombre, now that I look at the blocks side by side.

For this first quilt project I'm totally following directions in a book: Simply Retro, by Camille Roskelley.


I've chosen the Playground pattern, as it seemed simple and was already in a decently large size without me having to do lots of math to make it bigger. My fabrics are a mix of stash and specially-bought fabrics. Working on these blocks taught me that the more expensive quilt material does make a difference, as the hand feels more supported and I think it will support the hand-stitching much better.  Did I mention I plan on hand-quilting this beast? I can only imagine how my Granny would feel if I did it by machine...

Unrelated News

Husband and I are going to have a family gathering in May of this year so our immediate families can finally meet one another. That's got to be the only problem with eloping - families never meet. The other consequences I can deal with (I mean, they're not my favorite, but they're manageable). I've thought that my siblings would get along with husband's siblings, and that our parents, for as different as they are, would find common ground in many things, or at the very least enjoy each other's company.

I decided to make invitations to send to everyone with travel info, food info, and other little details. Naturally, this meant purchasing cards of different shapes and colors from one of the most brilliant stores in the world - Paper Source!!!! - and experimenting with pens, markers, and handwritten fonts, among other things. 

There isn't much to plan for this gathering, but my mom and I figured out that both families can eat on dishes that were either given to my parents at their wedding or are otherwise heirlooms, which is cool. I'm excited for everyone to finally get to know one another. 

Sunday, August 31, 2014

Presents for Nice People

Much has happened since my last post.

I finished a dress I've yet to tell you about. Classes have started at the university.  My parents bought us a washer and dryer (!!!!!!!!!!!!!!!!!!!!!!!!!!!!!!!!!!!). A kitty cat decided she lives with us.  Neighbors got this ADORABLE giant puppy named Jake - I think he's a Great Dane. Plus lots of other great things.

So, my absence isn't for lack of crafting or activity-ing, but it is for lack of time to activity and then blog about it.

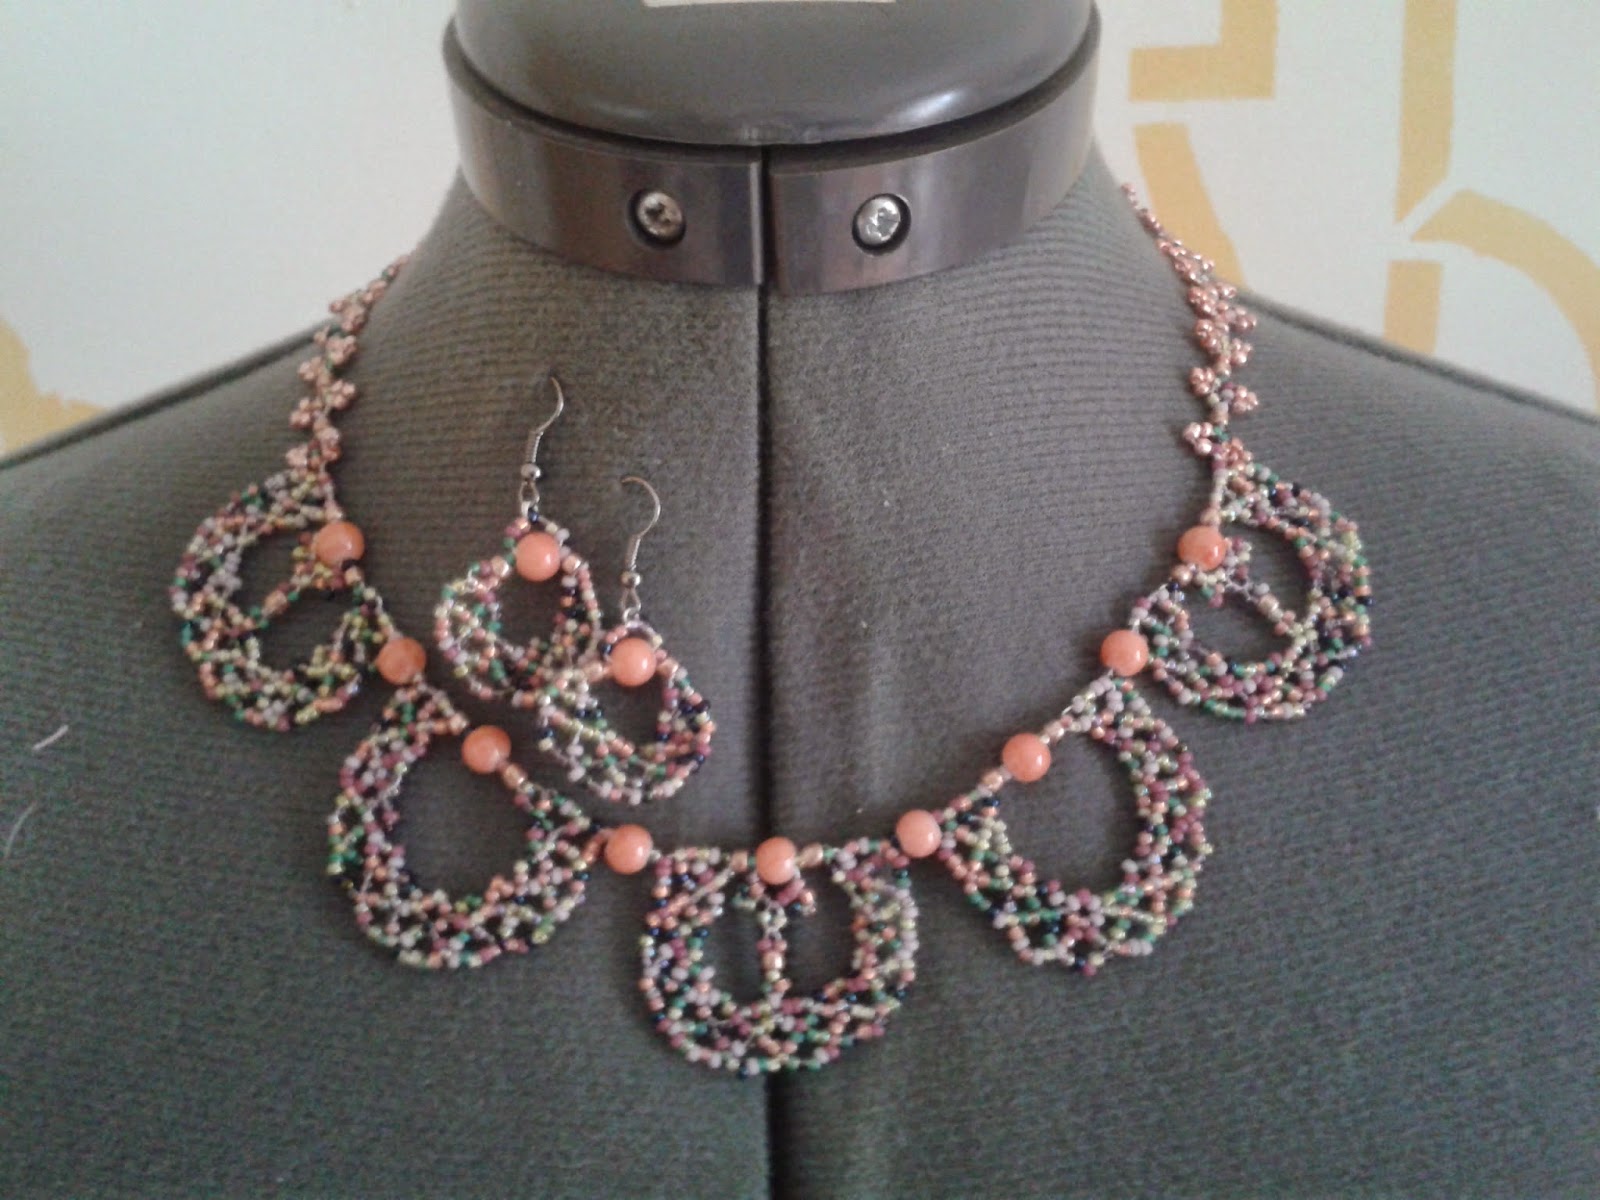
I'm lumping two projects together in this post: a necklace for Brenda, and an apron for Eriko.  Brenda is a staff member at Concord who helps keep the Fine Arts Bldg looking fly, and after she commented on a necklace I gave to Karen, our secretary, I decided I should surprise her with one!

It was nice to sit down last Saturday and just play with beads for a little while. The new kitty likes beads...so that was an adventure...but I did get this project finished.


It's based on the cover design of the book Beaded Allure, by Kelly Wiese.  She has a second book called Beaded Romance, but I haven't purchased it.

Here's the cover of the book:
I kept the 5 circles on top but omitted the others, as they seemed fussy to me. And, I secured down the dangly things in each circle.
I drafted a pair of earrings based on the circle motif.


Picots around the back, with a big, bright bead as a clasp.


The proportion with the body is flattering, I think.

The other project I recently completed is an apron for Eriko.  Eriko and Pius got married August 8th (I shall forever remember because that's MY anniversary, too) and husband and I were two of the lucky few with them.  I got into the habit a little while ago of making dear friends aprons for no reason. However! It has worked out that nearly everyone I have given an apron to has either gotten married or engaged in the last year...sooooooo take THAT e-Harmony. 

Anyway, Pius and Eriko have known Casey longer than I have, but they made me feel so welcome during their wedding festivities. It was never "just" Casey for a photo or something - it was always both of us. That's a small thing, but it really made me feel like I belonged there with them and wasn't a recipient of a courtesy invitation only.

So! Though Pius and Eriko are already married, I will continue my tradition by gifting her an apron.  There's not much to say about it, as making one of these is a nice and easy project. I used cottons from my stash, and one is left over from making my own apron, so now Eriko and I are connected by cotton. Let's make that a thing, internet.

No pictures of the apron because I want Eriko to be surprised when she gets it. I will, however, provide you with a photo of my sewing helper as she sits atop her royal tower of pattern storage.

Leeloo Multipass Cangelosi Cat

She and I have already laid ground rules on when she is and isn't allowed in the sewing room. Pattern cutting?- nope. Fabric cutting?- nope. General sewing - sure.

I cut fabric for a performance top yesterday. Aiming to finish it by my recital on the 9th. Oh, speaking of!!