Showing posts with label casual. Show all posts

Sunday, April 30, 2017

Made! - Vintage (1973) Simplicity 5914

Finished a few weeks ago, I present my most recent project!

I'm well-pleased with how this dress turned out! I was able to practice a number of techniques, from handstitching to French seams on the armscye.  

The pattern was gifted to me by my first grade teacher, Mrs. Worth. We have reconnected via Facebook and a love of sewing, and she surprised me by dropping off a bag of patterns that she no longer uses.  This one is a 1973 release: Simplicity 5914. 

I made View 2, shown in blue
I was intrigued that the size printed was a 12.5...and guess what? It fit perfectly! I only made a few alterations, like a long torso, erect back, and armhole adjustments, but I always do those things. The sleeve width, bust, waist, and hip all fit without effort. Yay!

It's cool that they used to print pattern pieces on the envelope back. They don't do that anymore, probably because they made the line drawings much larger, or because they now print directions in French on the back as well. 


The fit through the back is one of my best: clearly fitted, but enough ease to really move without worry. I played piano and marimba in this for a few hours with no pulling at the arm or center back. I'm rather proud of the centered zip - typically, I avoid these, but decided to give it another go, mostly because there wasn't a good way to make it lapped, due to the collar at the top, or move it to the side, due to the sleeves. 


The center front seam has serged allowances and is handstitched at the point. The sleeve cuffs are whipstitched so they won't get floppy and fiddly in the wash.


I did my usual collar trick of removing 1/16" from the underside so the edges rolled nicely. These lapels turned out great! The topstitching was a great test of patience and focus, as I used really small stitches and didn't want to rip any out to start over!

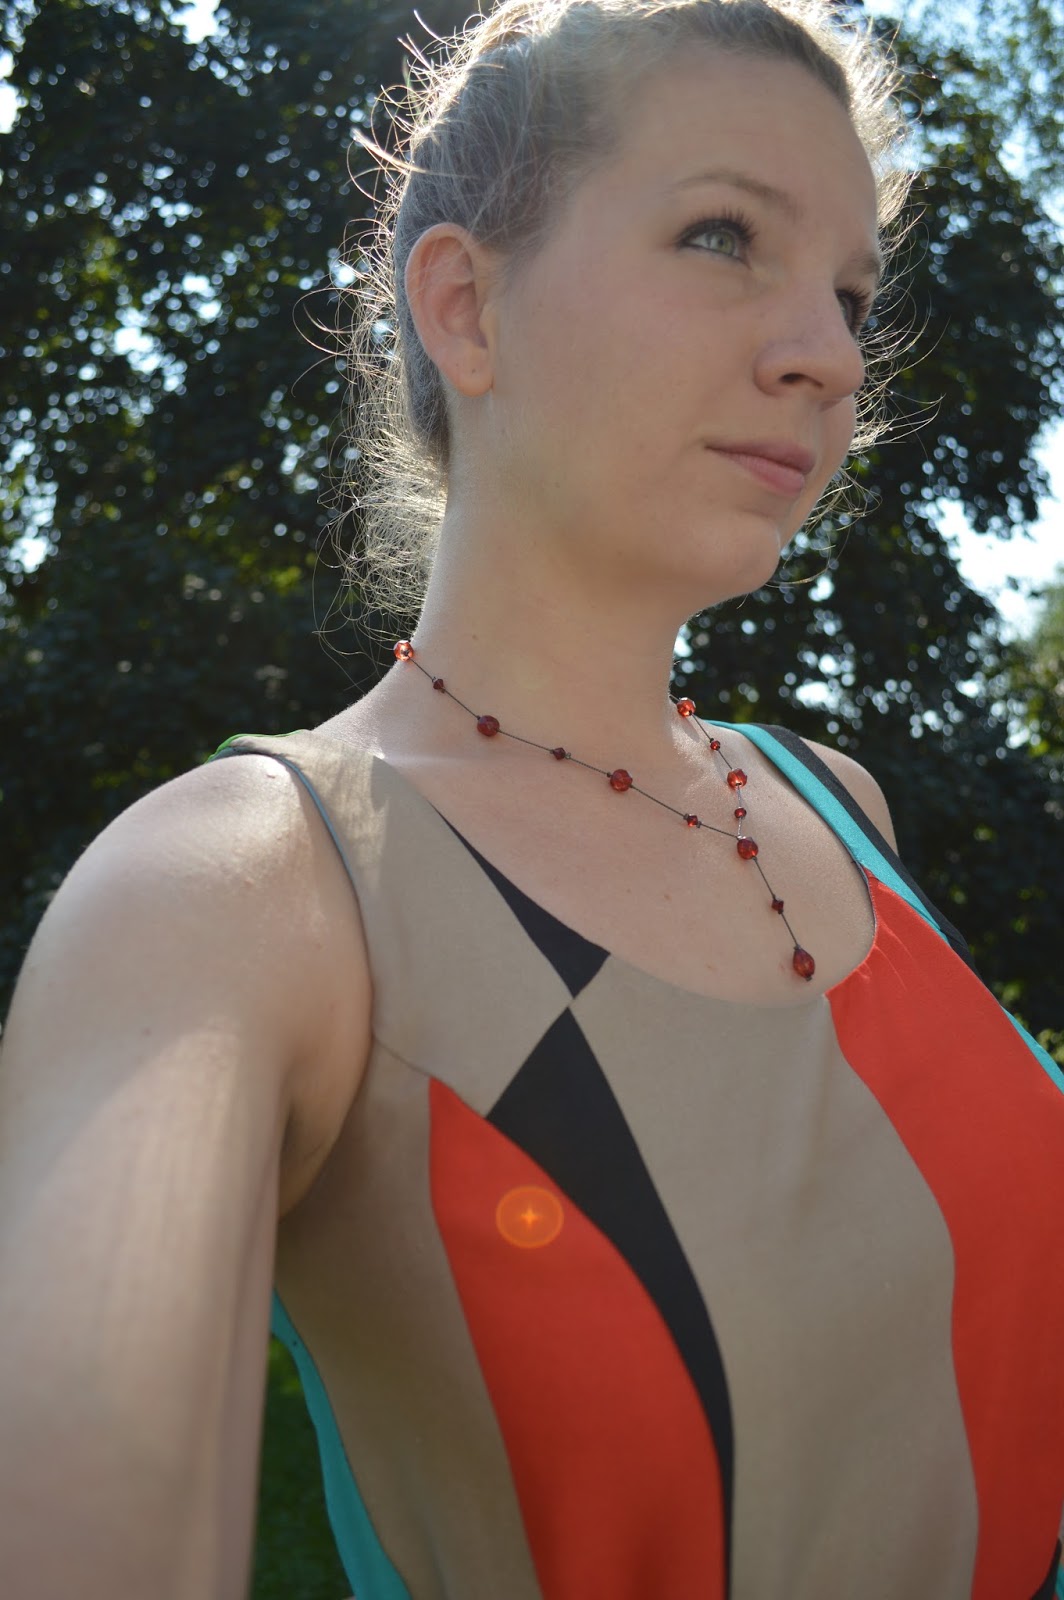
Lastly, here's a different angle to see the color of the fabric more accurately.

On second thought, maybe next time I'll remove a bit of width from the bodice fronts, but for the moment I'm satisfied. I wore it to work with leggings underneath (casual Fridays, mmhmm), but need to purchase a slip for warmer weather. The fabric is probably a little too thin for this design, but I really wanted to use it anyway. It was purchased from my local store, as was the zipper. Yay, supporting local business!

I've got a maxi dress in the works for New Music Gathering, a conference of sorts that I'll be attending and performing at next month.  It's almost done, and I can't wait to share it!! :)

Friday, October 7, 2016

Made! - Vintage Simplicity 9332

It's probably safe to say that most folks don't interact much with their first grade teacher once they leave elementary school.  But we all know how social media has changed the ways we connect with one another, allowing us to keep too many tabs on others' life events, not to mention render the classic high school reunion all but useless.

But sometimes it's delightfully surprising what happens, like when my first grade teacher, Mrs. Worth, and I became friends on Facebook.  Truth be told, she has always reminded me of my mom, probably because they look alike.  I found out that she, too, enjoys sewing, and had many a pattern that needed a new home.

I am that home!


She was nice enough to drop them off with my parents, who delivered them to me on a recent visit.  There was a whole mix of styles in the box, many from the 70's, which - if you recall a different pattern collection gift from family - nicely compliment my collection from the 50's and 60's.  My aunt often mails patterns, too, which are usually 80's and 90's. So...costume designers, hit me up. Ha!

Anyway, one of the cute and practical patterns was for something called a scooter skirt.  It's basically a skort (skirt with shorts underneath).  An added detail is a tab with D-ring closure.  The pattern is drafted for a 24 inch waist, which I haven't had since middle school and needed to adjust to fit my current size. ;)

I used a pretty purple zipper because sometimes you have to rebel against matchy-matchy.


The fabric is a stretchy gray denim that I originally planned for another pair of Ginger shorts.  In hindsight, it's a bit too stretchy for this pattern, but it does make this make incredibly comfortable, even on a 10-hour drive! Ask me how I know...


I wore this out to a concert the day I finished it, and it was very comfortable! Husband and I went out for a drink afterwards, and rather than having to wiggle into a hightop chair in a short skirt I could just step right on up there, no worries! Yay, shorts! I must admit, as someone who moves a lot and isn't always the poster-child for graceful etiquette, these are good for me.

Rather than use D-rings for the tab I just tacked it down with a button that I've had for years. I love it!

See that LooCat tail in the background? She likes to help Momma sew...

I also tacked down the facing to the darts and seam allowances, making the inside very clean.

Thanks, Mrs. Worth, for sharing your patterns with me!

Thursday, September 29, 2016

Made! - Simplicity 8019

It has been quite a while since I've shared some makes on the blog, mostly because I've been super busy! That's not to say there hasn't been sewing, as there is always sewing. Here are some of the exciting reasons I've been preoccupied.

I'm now teaching at JMU! It's nice to be in the academic environment again working with college level students, even if academia does have its fair share of "opportunities" right now.

A new chamber music project, L+M Duo, has officially launched and completed a debut tour in east TN: UT, Carson-Newman University, and Lincoln Memorial University.  Our instrumentation is marimba and piano - and we both play each instrument, which makes for very interesting programming. Our next concert is in November in Chicago. Brrrrrrrrrr

We also got to visit with each of our families in August, which was a real treat. Love them all.

I also turned 30. :)

Now, back to the sewing...

How I've gone this long without making a maxi skirt that included buttons is beyond me, as I love both of those things.


For this project, Simplicity 8019, a re-release from the 1970s, was perfect. It comes with four marked lengths.


The fabric is a black rayon challis bought at my local fabric store - woohoo, support local business!


I made it for a double family vacation in Florida, and it fared well.  I figured the humidity and a long skirt would be heavy, and while that was true, the tendency of every establishment to overdo the AC meant that I was actually quite comfortable.  This skirt is also a great one for flying, for the same reasons!

Slight alterations were made, from size grading to skirt lengthening.
Future changes:
  - add even more room around the front button band, as well as figure out how I want to tack it down
  - shape the waistband and use a bit heavier interfacing
  - lengthen the waistband to include a tab and button on the inside of the garment, as there's      otherwise slight pulling due to the horizontal button holes

Surprisingly, the pattern doesn't mention stay-stitching or any type of top-stitching for the button band.  Speaking of buttons...


The inside is done with all French seams, and the hem is a simple double hem, topstitched on the front.

The skirt works with a shirt tucked or untucked, which is great.  I'll probably be making more of these, as it was an easy project once the loooooooong pieces were all cut out.  You know how certain styles feel like that really suit different people? I've always loved long skirts.  I don't think they have to only be formal or dressy, though that's when we see them most often.  Nor do they have to be reserved for modesty only; in a fabric that moves, like rayon challis, they can be really flattering and attractive.  And, due to the  length, with the right styling they can be totally work appropriate.


Saturday, August 13, 2016

Made! - Ginger/Simplicity 1373 Shorts

This is the second go-round of this pattern hack, and I made a few adjustments.  Not too many pictures, as there are only so many ways to examine simple black shorts. :)


Mostly, I wanted to increase the comfort level. We all know shorts that don't fit *just right* end up bothering you with wedgie occurrences every time you sit or stand up. I made some adjustments to fix that this time around; namely, increasing the crotch length, which sounds disgusting (and may end up with some weird blog traffic thanksGoogle) but essentially means I lengthened the curve that has to go around my body at the center seam.


I shortened the back yoke to fit my curvy swayback.


Otherwise, I kept my hack the same as the first time, following the Ginger instructions. Simplicity 1373 served only as a guide to the length and shape of the legs. I wound up not topstitching each seam, as I wanted these to pass as "nice" shorts rather than casual ones.  The fabric is a moderate stretch cotton sateen, which makes for a clean, finished look.


I installed a pocket stay, as these are high-waisted and I'd like as much help as possible in the flat tummy department.  (There are great pocket stay instructions on the Closet Case Files blog.)  I used cotton remnants in my stash for the pockets, so there's a glorious mismatch on the inside of the shorts. To me this represents my true self: might look fancy on the outside, but the inside is a little goofy, hahahaha

The button is one originally intended for a wool cape, but those plans got derailed a few years ago. That being said, I love it and it works really well on this garment!


I've worn these shorts many, many times - including flights and a day at Universal Studios - since finishing them, which means I've washed them several times, and am happy to report they still fit.  I always pre-wash and high-dry my fabrics to prevent future misfitting, but part of me still worries about it.  Luckily (or unluckily?) I'm the only person in my house that does laundry, so I don't have to worry about someone else's good intentions ruining one of my outfits. ;)


Sunday, July 24, 2016

Made! - McCalls 6952

McCalls 6952, labeled as an Easy pattern, was just that.  It's a princess seamed, sleeveless dress in different lengths. I decided mine should be a maxi, and reach the floor when wearing flats.


The fabric was purchased a few years ago on a trip to Mexico, and I looooooooove it.  I was drawn to each color in the stripes, but particularly how they are laid out together.  The dress is cut on the crossgrain so the stripes are running vertically, and I had to let go of stripe matching, and aimed instead for straight grainlines.


I used some organza as the neck and armhole facings, though if I make this again I will use bias strips instead. The facings are thin and therefore don't show through, but I don't like having to think about it.


I ran each seam through the serger after basting the dress together for fit.  Upon looking at the measurements I would up cutting a size 10 with a size 10/12 at the bust.  In the future I may go to a full size 12 in the torso, as I would like just a tad more breathing room.

a blurry but truer representation of thecolors :)
I wore this dress to two weddings in Boston earlier this month, and received compliments from both guys and gals, so I think it's a successful garment!  You can be sure I'll take this on vacation later this summer!


It has the LooCat seal of approval!


Sunday, April 24, 2016

Made! - M6613

Ya'll, matching plaid is definitely not my favorite thing about sewing. Nonetheless, this garment turned out well! I looove the relaxed fit - I can play marimba and piano without it pulling!


I found this fabric - a lightweight flannel - on clearance at my local fabric store.  At the time our temps were still in the 40s, so...hence the lack of hesitation purchasing such a warm cloth.

The colors are beautiful! So saturated and bold - they look good with white, denim, black, and probably other colors that I happen to not own.  

Bias yoke!

I kept the length of my wearable muslin, blogged about here, but I added some width to the lower half of the front pieces to make room for my hips. 
In fact, many changes were made to the pattern after the first muslin was complete. 

- add 5/8" to sides at lower front, tapering to waist
- remove 2 1/4" of sleeve length
- remove 1/4" height from the collar stand
- remove 1/2" from each yoke shoulder, back armscye seam
- increase sleeve height
- raise each armhole 1/2"
- narrow the sleeve by 1/4"


Interestingly, I did not add length to the torso of this pattern. Perhaps that's because it's so gender-neutral? Not sure.  

At the suggestion of a recent article in Sew News - thanks, Nana, for the subscription :) -  all collar and collar stand pieces are interfaced for crisp lines, as opposed to just one of each.  Since the collar buttons were going to be omitted for this shirt, a crisp collar was an absolute must.


Crisp collar and matching pocket greatness.


All inside edges are finished as French seams simply because I'm in the habit of doing them. Next time I make a shirt for myself I'll use bound seams, though. 

Button color was a hard choice for this shirt. I couldn't decide between white, tan, blue, or navy, but it's obvious where things settled in that regard, I suppose.


I really like this shirt styled with white jeans or capris.  It helps it fit into the colorful seasons ahead. (Though summer is my favorite season and I'm really looking forward to it, I'm excited to wear this shirt with some jeans and cute brown boots in the fall!) 


Next project: a Mother's Day present for momma!!

Monday, April 11, 2016

Made! - M6613

After spending many hours creating a custom fit shirt sloper for my husband, I thought it was about time to make one for myself! So, when I came across M6613 during one of JoAnn's stellar pattern sales, I decided to snatch it up as a base shape.


I knew there would be lots of ease, since it's somewhat of a unisex pattern. (The line drawings make it look like there will be separate pieces for men and women, but that's a bag of lies...you have to do all of that in the fitting yourself.)

What I'm wearing here is my muslin, with no changes. I figured it's best to see what I'm working with before hacking it to pieces, no?  Seems I've got my work cut out for me! I wore it to work today with my Easter skirt.


For work I styled it differently, but here she is.
I got lots of compliments on my outfit, so I guess it looks alright!


As expected, there's a lot of room in the back, but I think I like that. My typical beef with button-ups is that there's not enough ease for me to actually move my arms. For my next version, I'll take some width out of the back beneath the yoke, so there's a slimmer silhouette but still wiggle room.

It's nice that the armscye is generous, but I think I will raise it a tad.  There's an opportunity for some work with the bust as well, but I'll talk more about changes when I make the shirt out of its intended fabric!

cat butt. she's not sorry.
I love this chambray so much that I decided no matter how it fits I'd make it right, complete with edgestitching and finished seams.

Inverted pleat for ease
The piece consists of two pieces, which are supposed to meet the yoke seam. Oops.


This shirt is nice and long, and I like it styled down, untucked. You'll notice that I'm short on buttons. I have so many that I refused to buy more for what began as just a muslin. So, I used four that were lying around and will purchase additional ones later.


I'll leave you with a picture with LooCat, who did not want to be photographed.

"Noooooo, Momma pleeeeeease....."
I'll catalog all my changes to the base pattern once I get working on the next shirt! It's exciting to think I'll have a sloper that fits me perfectly! Yay!

Tuesday, April 5, 2016

Made! - Simplicity 1541 and 1690, New Look 6343

Here they are, the last of my winter makes.

These were sewn for different occasions, from a special concert to Easter Sunday.

New Look 6343

Here's a pattern I've made twice already, once for me and once for my sister. Here is a winter verison, made up in a really comfy sweater knit I purchased at Ragtime Fabrics, my local store (that's only about a mile from my house). 

welcome to our living room!
I didn't worry too much about stripe matching except on the side seams. I wish I'd thought through the sleeves a bit more, but at least the sleeves match each other, even if they don't match the main part of the dress. 

I'm very happy with the result of my neck binding, though. I also edgestitched the armscye using a tiny zig-zag stitch.


Simplicity 1690

This pattern needs no further discussion here on the blog, considering there are previous makes - some blogged, several unblogged.  This version was for husband's solo recital at the university. I accompanied him on his Marimba Concerto no. 2 and played Jacob TV's Body of Your Dreams.  You can watch a video of me playing that piece here, but it's from a different concert.

I used some leftover fabric from a previous gift to my sister - and I looooove it. I added little purposefully messy cuffs on the sleeves for interest.  The sleeves are also lengthened by an inch so the fabric has a chance to drape nicely over the arm.


For the concert, I paired this top with my concert skirt, previously blogged about here.  This skirt is a TNT for concert days!


Simplicity 1541

This was my first time using one of the AmazingFit patterns, and I must admit that this skirt fits really well.  I made View C and followed the cutting and sizing instruction for the "Curvy" pattern. The main difference is that there are four darts in the back rather than the standard two.


I used less than a yard of fabric to make this, which asserts this pattern's place as one of the most amazing EVER.
Here's a close-up of the front princess seams and waistband.


I cut a size 12, used standard seams, and took out a tiny bit of length out of the center front to prevent the waistband from sagging. (I take this to mean that all of my curves are on my sides and in the back...lol)

There's a center back zip, and all edges are serged to prevent fraying.  To keep as much length as possible I used a scrap as hem facing, and I like the little detail and pop of color that can sometimes be seen, depending on how I move.


 Rather than slipstitching the waistband facing, I pressed under the edge and stitched in the ditch on the right side of the garment, catching the facing as I went.  It's my new favorite method.


Currently Sewing

Right now I'm working on a muslin for a button-up shirt for myself.  After making so many for my husband, I decided it was my turn! I'm learning a lot about my own shape, as well as where I want the ease to be.  I avoid RTW button-ups because the ease is never in the right place for me. I hope to remedy that through this muslin process!