Showing posts with label use the stash. Show all posts

Thursday, May 31, 2018

Made! - Simplicity 1069

Even if I wasn't dealing with extra poundage (still...guh) from little boy, I would have used my friend Amy's wedding as an excuse to make something. Duh.

It was a Boston reunion...of sorts! 

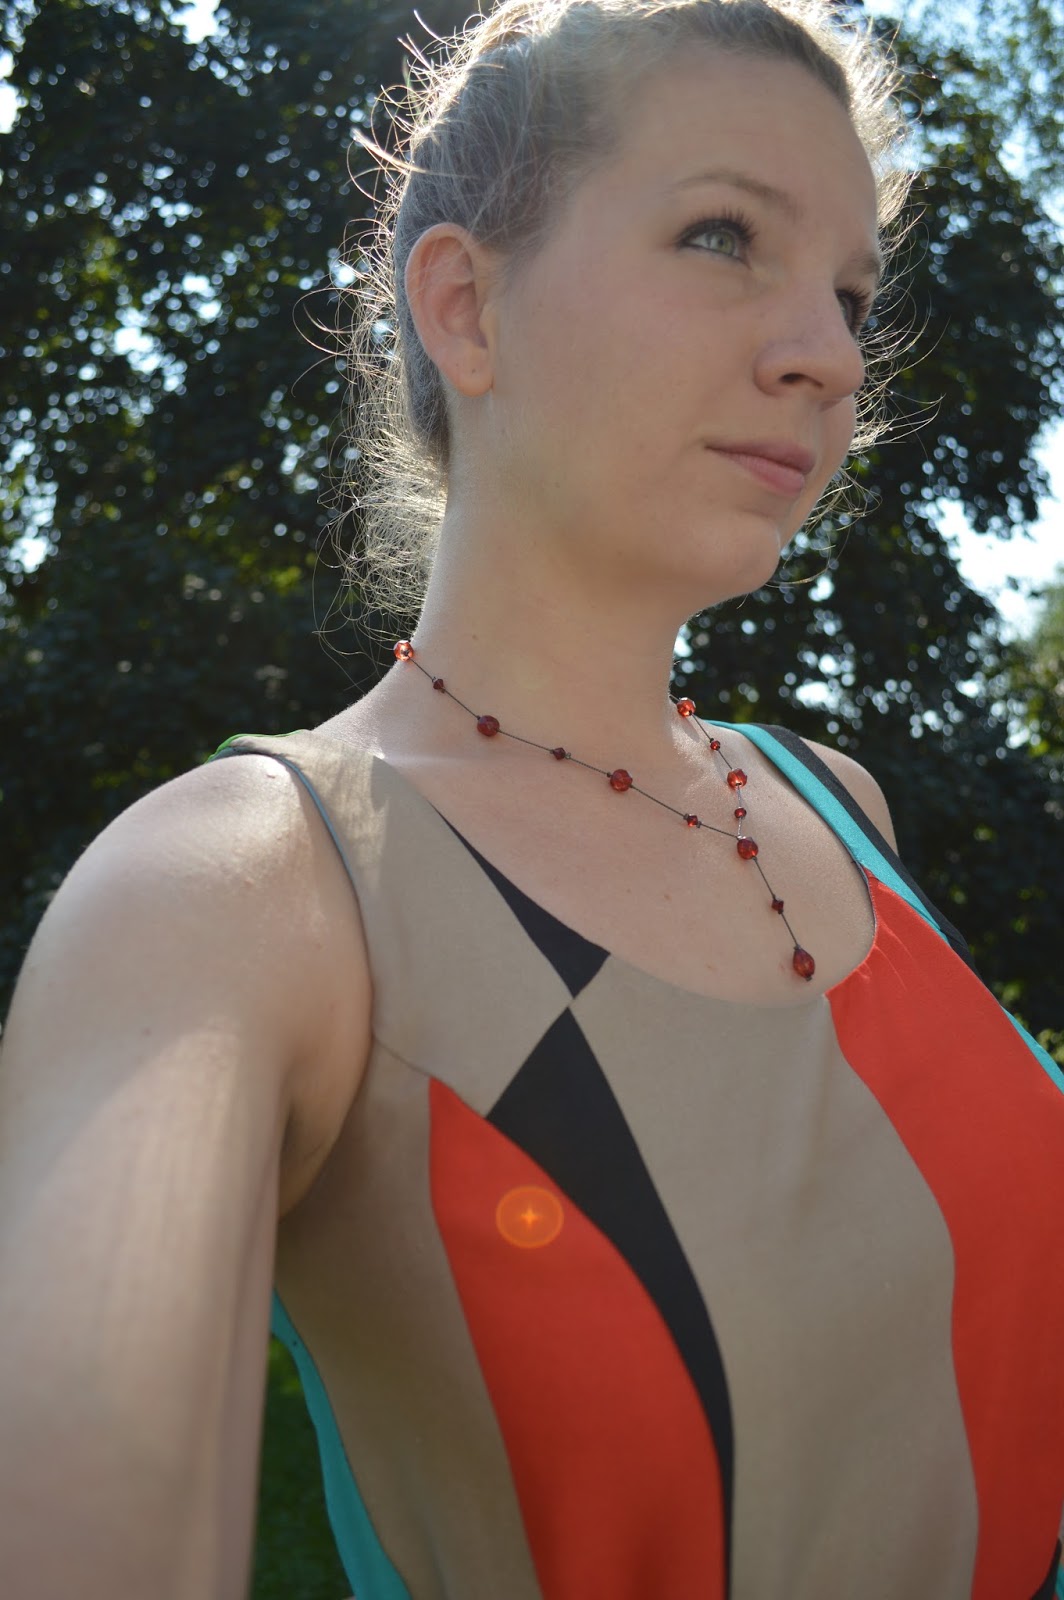
Since I find myself in the no-man's-land of body shapes and sizes - aka can't wear most of my usual clothes but refuse to buy any - I figure why not use the stash to fill in the gaps these days?  And, what's more adjustable than a wrap skirt? Simplicity 1069 was a perfect pattern.  It fits now, and it should fit later if-when I get back to my usual shape and size; all I'll have to do is move the waistband opening for the left tie.

Simplicity 1069, view D

The material is a Nicole Miller print from JoAnn, bought quite a while ago with a gift card from my sister.  I always planned on making a long skirt with it.  Even with buying extra I had to get creative with print placement so as it not have repeated panels. I ended up turning two of the pieces upside down, for print placement as well as fabric quantity.

All seams are French seams, and the waistband is slipstitched down on the inside.  The hem is a regular narrow hem.  I lengthened the pattern by an inch as I usually do, but I think I'll have to go 2" or 3" in the future with my more curvy curves.

I've worn this several times, and just love it.


These photos are on JMU campus after an afternoon of practicing. Little boy is rather tolerant of his parents needing to practice - he wears his protective headphones for a couple of hours and then gets to go on a nice walk outside. He loves being outside! Like his momma.

Love that boy.

Saturday, March 17, 2018

Made! - Butterick 6301

This jacket is the last of my maternity projects.  I started it in my last month of pregnancy and finished it in Robin's first weeks at home.  Things are settling down but the home uniform is still a bath robe, which is why you're getting only dress form photos. :) 

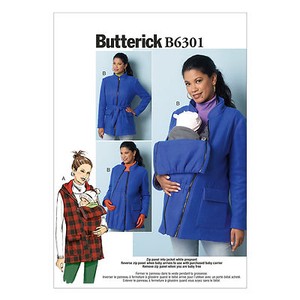
Butterick 6301 is a super practical jacket pattern with a center insert that transforms the jacket into a maternity or baby carrier option.  Though I never needed to purchase a maternity coat through pregnancy, I figured a coat that would allow me to zip Robin up while in his carrier would be really useful.

Image result for butterick 6301
The fabric is from my stash, bought many years ago on clearance.  


The lining is leftover from Christmas gifts a few years ago, and it makes me happy...all covered in kitties. :)


So, the only supplies I needed to purchase were the three separating zippers.  My local store didn't have three 26" in stock in an appropriate color, so I had to buy 28" zippers and instead lengthen the jacket.  (I figured I'd have to lengthen it anyway for my long torso, so this wasn't a big deal.)  The zippers are a warm gray, and I think it is a nice complement to the tan/slightly purple weave of the mystery clearance polyester/wool.  


The only stylistic alteration I made was to the collar: I shortened it by half its height.  I don't do well with turtlenecks or itchy collars, so a short one means I won't have to deal with that at all.  The front princess seams are topstitched, as is the lower half of the center back seam.  

The inside features a label (thanks, mom!) and joyful lining, much of which I handstitched.  


Now, onto the insert.  It's reversible, which is how you can get the two options out of it.  Figuring out the zipper direction for sewing was confusing until I decided to not look at the directions and instead to pin and zip it into the finished jacket - much clearer through tactile understanding over 2D pictures.  

Maternity-belly insert
 
Side View of maternity belly insert

Here's how I plan on wearing it this spring, with Robin in tow.


One day when we aren't all so tired and in comfy clothes all the time I'll add a picture of this jacket in action - with baby and all!!


Monday, September 25, 2017

Made! - Hack Vogue 8633 with maxi-length wrap skirt


Long wrap skirts have become a favorite garment.  You can make them to fit, but with some creative safety pinning you can change them to fit you at any point in life.  That's not the most glamorous point of view, considering I also enjoy the tailoring of men's shirts and couture hand-finishings, but sometimes a safety pin is all you need.  And we should admit that, mmm?


I made this dress for a family wedding.  The bodice, from Vogue 8633, is made of some upholstery fabric that I found and loved at my local fabric store.  The navy print I purchased in Utah while visiting my in-laws, and the coral satin underlay I bought locally on clearance.


Since the upholstery fabric is so thick, I didn't interface any of the bodice.  It stands up well on its own, and can be molded into different shapes at the neckline.  I prefer it curved down a little bit.


As part of my design, I chose to extend the back bodice around to the front and secure it with buttons on an angle, so that the bodice matches the wrap of the skirt.  This also kept me from worrying about a zipper.  It's lined, and the sleeves are bound in bias tape.


When attaching the skirt to the bodice, I used an inch allowance on the skirt so I could wrap the raw edges of the bodice.  Though it thickened the layers there a bit, I'd rather have that than scratchy edges.


Something I've contemplated is pinning up parts of the skirt to asymmetrically raise the hem, to make it friendly for warm weather.  The family wedding was outside, and this Tennessee September cooperated - it was actually a bit chilly! So, a maxi dress was just right for the temperature and breeze.


Anyway, this is my most recent make!  Not too difficult, not too easy.  Somewhere right between.

Tuesday, July 18, 2017

Made! - Simplicity 2756

Stash-busting projects are the best. When you don't have to buy anything to make a garment because you have perfect leftovers.

This top is one of those projects.


She's a simple one: Simplicity 2756, one of the first released Project Runway patterns.  The idea behind these is that you pick and choose what elements you want to make, and the envelope tells you how much added material to purchase for a ruffle, bubble sleeve, long sleeve, yoke, collar, or any combination of the above.
Image result for simplicity 2756  Image result for simplicity 2756


I've used this pattern twice before, both long before I started blogging. One of those projects was part of a costume for the musical Little Women.  The yoked, long-sleeve version was perfect. I used velcro anywhere a button would be for quick changes, and combined with a long skirt from a different pattern, made a perfect outfit.

But back to this project!

The material is leftover from when I made Butterick 5814 years ago, while still living in WV.  The dress fit alright, but a long torso adjustment was too fiddly and I would up giving the dress to Goodwill after one wear (and subsequent wash, of course!).

I like this top a lot. I've always been a fan of raglan sleeves, and I love the colors of this fabric, as well as the open neckline.  Due to a slight shortage of fabric, I shortened the sleeves and finished them with a narrow hem.  I rather like the simplicity and proportion of it.

back

I graded from a size 6 at the shoulder to a size 12 at the hip, lest I accidentally make a mumu instead of a top.  Inside seams are either serged or French seams, and the neckline is bound with single-fold bias tape.  It was an easy make, and a satisfying one as I got to use the remnant stash.

Can't believe it's been April since the last post.  Husband and I have been traveling everywhere and playing concerts in different cities, so we've had a lot to focus on the last two and a half months.  I've been sewing: 1 maxi dress, 1 tunic, 1 bespoke shirt for husband, and now this top - but there's been no time to blog. I've barely had time (and energy) for work email, practice, and home improvements (like a brand new DIY backsplash across our entire kitchen) as it is.

Anyway, onward and upward, with hopefully more blogging as we go!


Wednesday, January 18, 2017

Made! - Burda 7132

After some teasers in the last post, here's the finished product of what has been my only garment sewn in the last 2-3 months (more on that later)- a dress made from Burda 7132.


I made some small alterations to the pattern, mostly in the form of wedges in the back bodice and at the bottom on the front bodice. Evidently I am not as...buxom...as the pattern suggests. My first version of this dress has some sight gaping at the center front neckline, but this one doesn't!


This make is totally a 'use the stash' project, as each fabric is something that I bought a remnant of at the fabric store (or had remnants of at home), and pieced them together to make it work! The back of the skirt is my own solution to not having enough of the pastel zebra print - I think it works.


The pattern does not include a lining, but I knew I had to add one since the fabric is so pale. (Photographed that for this previous post.) I underlined each piece: hand-basting them together then securing the edges with my serger before I constructed the dress.  I left the basting in until I was ready to finish the seam allowances.

Admittedly, I'm not super stoked with the funkiness going on at the back of the dress regarding the rippling. I didn't have this problem the first time and I'm not sure what's going on with it now. Maybe I need to alter the princess cut of the bodice and add another dart in the skirt?? Good thing the hair is long, I suppose. Ha!!


The real focus of this project was the insides. Though I went for a lazy serged finish, I did whipstitch every seam allowance to the underlining, meaning that this dress will never have funny lumps or bumps due to a rumpled seam allowance.  This is something that I get really annoyed by, and have always stitched down the first few inches of an allowance, especially at an arm hole or neckline, but buying and reading part of Claire Schaeffer's Couture Sewing Techniques inspired me to try something different.

Image result for shaeffer couture sewing

You may be thinking "a sleeveless dress...in January?!" but there's something you should know about me and my genetics. We are normal-temperatured until we do the slightest amount of work, and then we need to basically be wearing gym shorts and tank tops. So, even in winter time I find myself wearing sleeveless dresses with cardigans and scarves, only to slowly peel off outer layers through the day as I practice, play, and teach.  Cardigan is always back on for teaching, though. ;)


The lack of garment sewing isn't for lack of work, as hinted at by my previous post. Since Christmas is passed and the item bestowed to its rightful owners I can announce that I've been working on a quilt since late September to give to my sister and her husband as a belated newlywed present.  I was working on it until December 22, when husband and I drove to TN for family Christmas. Hand-quilted it all but the border, and have the callused and red fingertips to prove it.  Sister really appreciated it and really liked the colors. She has to send me photos because I forgot to photograph it before wrapping it. Doh! (But perhaps this gives insight into how last-minute its completion was.)

It may be a bit before she can get me pictures, so in the meantime I'll keep on with other sewing posts. I am really excited to see how she will be able to use it!

Friday, October 7, 2016

Made! - Vintage Simplicity 9332

It's probably safe to say that most folks don't interact much with their first grade teacher once they leave elementary school.  But we all know how social media has changed the ways we connect with one another, allowing us to keep too many tabs on others' life events, not to mention render the classic high school reunion all but useless.

But sometimes it's delightfully surprising what happens, like when my first grade teacher, Mrs. Worth, and I became friends on Facebook.  Truth be told, she has always reminded me of my mom, probably because they look alike.  I found out that she, too, enjoys sewing, and had many a pattern that needed a new home.

I am that home!


She was nice enough to drop them off with my parents, who delivered them to me on a recent visit.  There was a whole mix of styles in the box, many from the 70's, which - if you recall a different pattern collection gift from family - nicely compliment my collection from the 50's and 60's.  My aunt often mails patterns, too, which are usually 80's and 90's. So...costume designers, hit me up. Ha!

Anyway, one of the cute and practical patterns was for something called a scooter skirt.  It's basically a skort (skirt with shorts underneath).  An added detail is a tab with D-ring closure.  The pattern is drafted for a 24 inch waist, which I haven't had since middle school and needed to adjust to fit my current size. ;)

I used a pretty purple zipper because sometimes you have to rebel against matchy-matchy.


The fabric is a stretchy gray denim that I originally planned for another pair of Ginger shorts.  In hindsight, it's a bit too stretchy for this pattern, but it does make this make incredibly comfortable, even on a 10-hour drive! Ask me how I know...


I wore this out to a concert the day I finished it, and it was very comfortable! Husband and I went out for a drink afterwards, and rather than having to wiggle into a hightop chair in a short skirt I could just step right on up there, no worries! Yay, shorts! I must admit, as someone who moves a lot and isn't always the poster-child for graceful etiquette, these are good for me.

Rather than use D-rings for the tab I just tacked it down with a button that I've had for years. I love it!

See that LooCat tail in the background? She likes to help Momma sew...

I also tacked down the facing to the darts and seam allowances, making the inside very clean.

Thanks, Mrs. Worth, for sharing your patterns with me!

Saturday, August 13, 2016

Made! - Ginger/Simplicity 1373 Shorts

This is the second go-round of this pattern hack, and I made a few adjustments.  Not too many pictures, as there are only so many ways to examine simple black shorts. :)


Mostly, I wanted to increase the comfort level. We all know shorts that don't fit *just right* end up bothering you with wedgie occurrences every time you sit or stand up. I made some adjustments to fix that this time around; namely, increasing the crotch length, which sounds disgusting (and may end up with some weird blog traffic thanksGoogle) but essentially means I lengthened the curve that has to go around my body at the center seam.


I shortened the back yoke to fit my curvy swayback.


Otherwise, I kept my hack the same as the first time, following the Ginger instructions. Simplicity 1373 served only as a guide to the length and shape of the legs. I wound up not topstitching each seam, as I wanted these to pass as "nice" shorts rather than casual ones.  The fabric is a moderate stretch cotton sateen, which makes for a clean, finished look.


I installed a pocket stay, as these are high-waisted and I'd like as much help as possible in the flat tummy department.  (There are great pocket stay instructions on the Closet Case Files blog.)  I used cotton remnants in my stash for the pockets, so there's a glorious mismatch on the inside of the shorts. To me this represents my true self: might look fancy on the outside, but the inside is a little goofy, hahahaha

The button is one originally intended for a wool cape, but those plans got derailed a few years ago. That being said, I love it and it works really well on this garment!


I've worn these shorts many, many times - including flights and a day at Universal Studios - since finishing them, which means I've washed them several times, and am happy to report they still fit.  I always pre-wash and high-dry my fabrics to prevent future misfitting, but part of me still worries about it.  Luckily (or unluckily?) I'm the only person in my house that does laundry, so I don't have to worry about someone else's good intentions ruining one of my outfits. ;)


Sunday, July 24, 2016

Made! - McCalls 6952

McCalls 6952, labeled as an Easy pattern, was just that.  It's a princess seamed, sleeveless dress in different lengths. I decided mine should be a maxi, and reach the floor when wearing flats.


The fabric was purchased a few years ago on a trip to Mexico, and I looooooooove it.  I was drawn to each color in the stripes, but particularly how they are laid out together.  The dress is cut on the crossgrain so the stripes are running vertically, and I had to let go of stripe matching, and aimed instead for straight grainlines.


I used some organza as the neck and armhole facings, though if I make this again I will use bias strips instead. The facings are thin and therefore don't show through, but I don't like having to think about it.


I ran each seam through the serger after basting the dress together for fit.  Upon looking at the measurements I would up cutting a size 10 with a size 10/12 at the bust.  In the future I may go to a full size 12 in the torso, as I would like just a tad more breathing room.

a blurry but truer representation of thecolors :)
I wore this dress to two weddings in Boston earlier this month, and received compliments from both guys and gals, so I think it's a successful garment!  You can be sure I'll take this on vacation later this summer!


It has the LooCat seal of approval!


Sunday, June 19, 2016

Made! - Performance Jumpsuit

Never thought I'd be one to ever wear or make a jumpsuit, but here I am - donning a garment I designed and completed almost a month ago.


The pants are from a Vogue knit pattern I've used previously to make a pair of performance pants.  They're made of the same material as this jumpsuit, and I perform in them and wear them to work. Nobody knows they are as comfortable as pajamas.

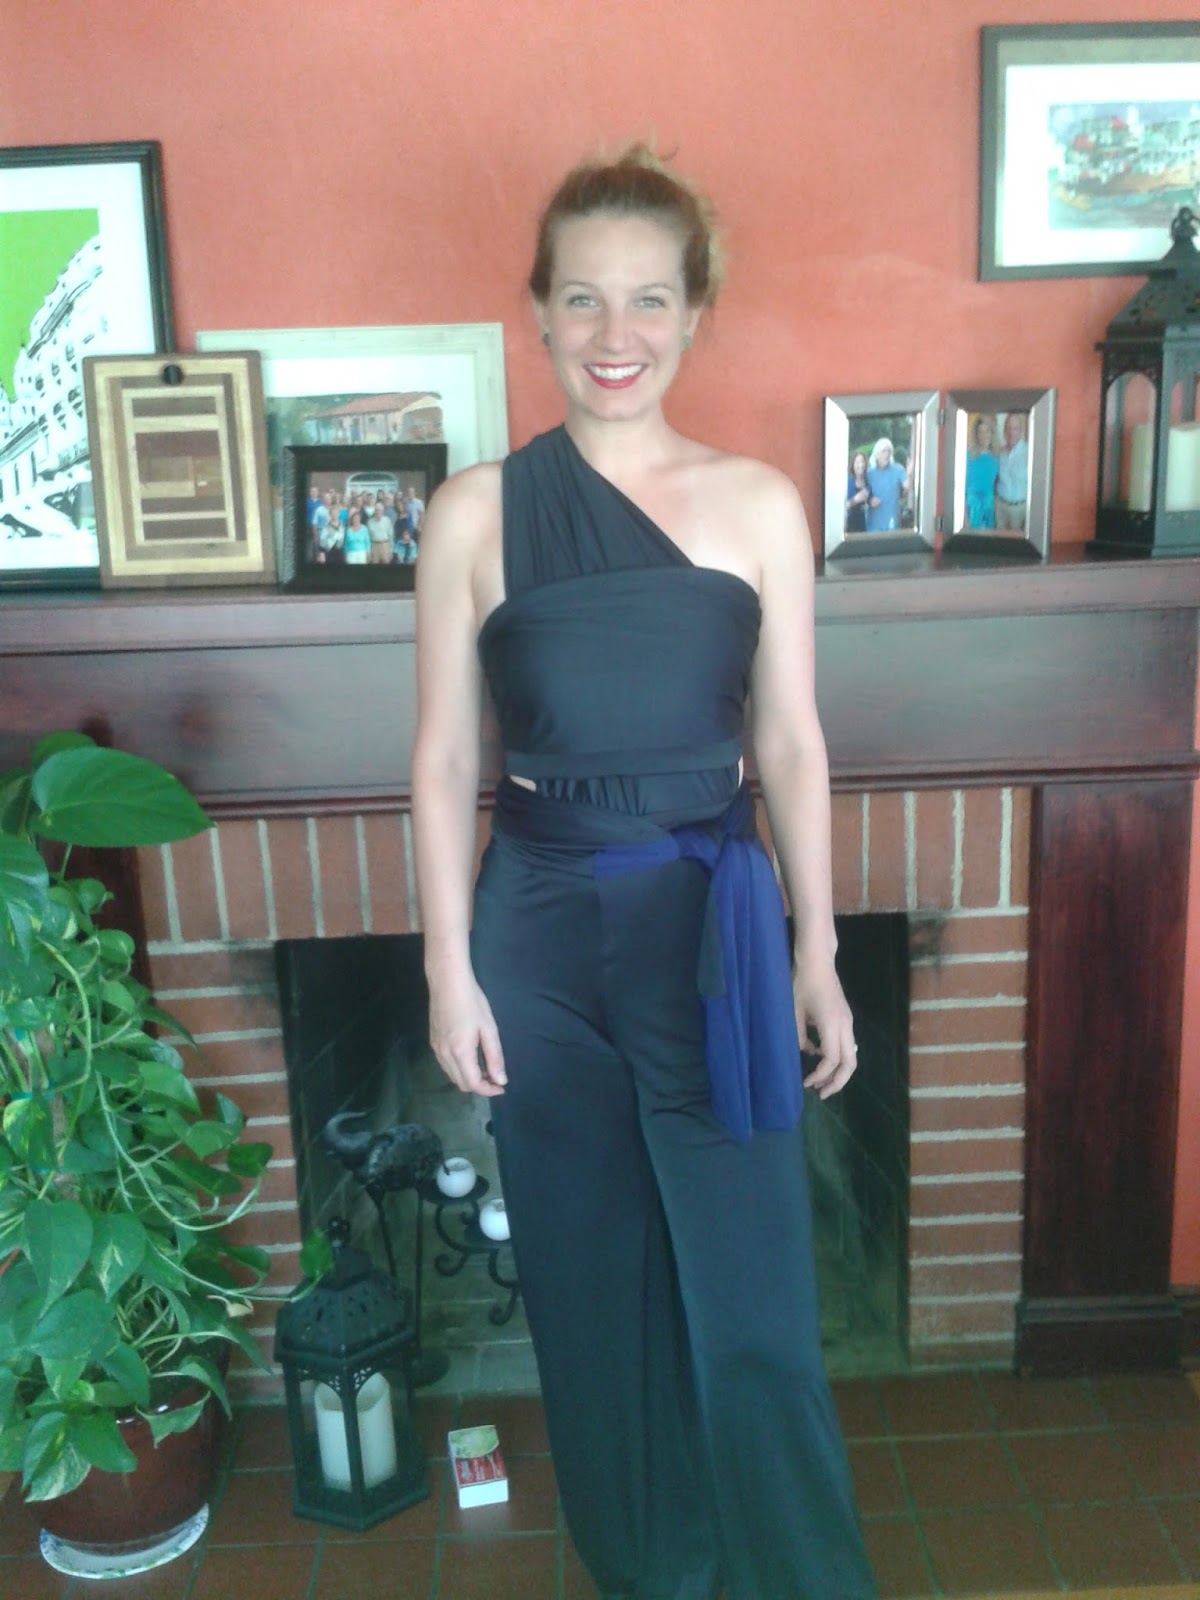
The bodice is made of two overlapping rectangles that form a wrap front.  I'm a fan of this design because it's incredibly comfortable and rather conservative from the front, but the back is nearly open, keeping me from getting too hot.  Stage lights can get really, really warm, so this is a plus! 


If you're wondering about whether or not the top will stay secure while playing, I wondered about that, too.  I wore this for two multi-hour practice sessions and am happy to report that not only did it stay up, but it didn't budge at all! 

There was some blue knit in my stash leftover from another project, so I decided to tack it onto the bodice wrap as a fun detail.  As much as I love black, sometimes it's nice to break it up a little bit. 

There are innumerable ways to tie the bodice, but here are some I've discovered that I like.

Halter with centered knot (ala loin cloth)


One shoulder with midriff cutouts


Cap sleeves

Back of cap sleeve version

Looking at these photos is a learning experience in what neckline and bodice styles are most flattering on me. I think the halter, though that's the intended design, is my least favorite on my shoulders.

Thanks to husband for taking pictures. :)